Get Started with Falcon Fusion SOAR
The Oxford dictionary defines soar as to “fly or rise high in the air”. While this pairs nicely with Falcon, SOAR is an acronym, not a word, when it comes to cybersecurity. In a cybersecurity context, SOAR stands for Security Orchestration, Automation, and Response, which is a group of technologies that enable organizations to automatically respond to certain security events.
Falcon Fusion SOAR is an orchestration engine that allows you to create scheduled or on-demand workflows to automate processes across the Falcon platform. First-party actions provided by CrowdStrike include device queries, sending email, creating Jira tickets, writing to logs, and many others.
With the launch of Falcon Next-Gen SIEM, Falcon Fusion SOAR acquired new powerful capabilities, including the ability to orchestrate across third-party tools. Numerous out-of-the-box SOAR actions are readily available through our content library. Examples of these third-party actions include, but are not limited to, ingesting data, deactivating users if they become high-risk, and installing security tools the first time our sensor is detected. For those tools that are not available, or are unique to your SOC, you can build SOAR actions yourself.
CrowdStrike’s Falcon Foundry, our low-code app platform, empowers you to build custom actions that you can leverage in Falcon Fusion SOAR workflows to automate and orchestrate actions across your critical systems.
In this tutorial, you’ll learn how to build a Falcon Foundry app that connects to Okta using that product’s public API and automatically fetching data from their system. The orchestration of fetching and loading the data will all be handled by Falcon Fusion SOAR and the data retrieved will be loaded into LogScale for further analysis.
You might be asking, what is LogScale?
LogScale stores data that you can query and use to make decisions about security, performance, and resilience. The stored data can be used by SecOps for monitoring security and infrastructure, SysAdmins, DevOps and many others. LogScale can ingest, aggregate, and analyze massive volumes of streaming log data from a wide array of sources at petabyte scale.
Prerequisites:
- Falcon Insight XDR or Falcon Prevent (one app)
- Falcon Next-Gen SIEM or Falcon Foundry (1+ apps depending on entitlement)
- An internet connection
First, we’ll start by creating an app using Falcon Foundry that in turn, will leverage Falcon Fusion SOAR.
Create an App in Falcon Foundry
In A Practical Guide to Building a Falcon Foundry App for the First Time, I showed you how to use the Foundry CLI to create an app, add a UI extension, and deploy it to Falcon Foundry. In this tutorial, you’ll build everything through the Falcon Console and your web browser.
You’ll start by creating an API integration with Okta so you can get a list of users, as well as deactivate users. You’ll share these operations as actions in Fusion SOAR. Then, you’ll create a scheduled workflow that automates:
- Fetching API data;
- Optimizing data with event information;
- Putting it into LogScale.
Finally, you’ll create another on-demand workflow that deactivates a user.
Log in to Falcon and go to Foundry > Home. This is Foundry’s App builder UI with building blocks for integrations, data, authorization, automation, logic, and experiences. Select Custom app under the Start building with Foundry section.
Enter the following values and Save:
- App name:
Okta Demo - Description:
Okta API integration with actions to integrate with LogScale. - App logo: I used the avatar from @oktadev.
Add an API Integration to your Falcon Foundry App
Select Start from the Data box on the next screen.
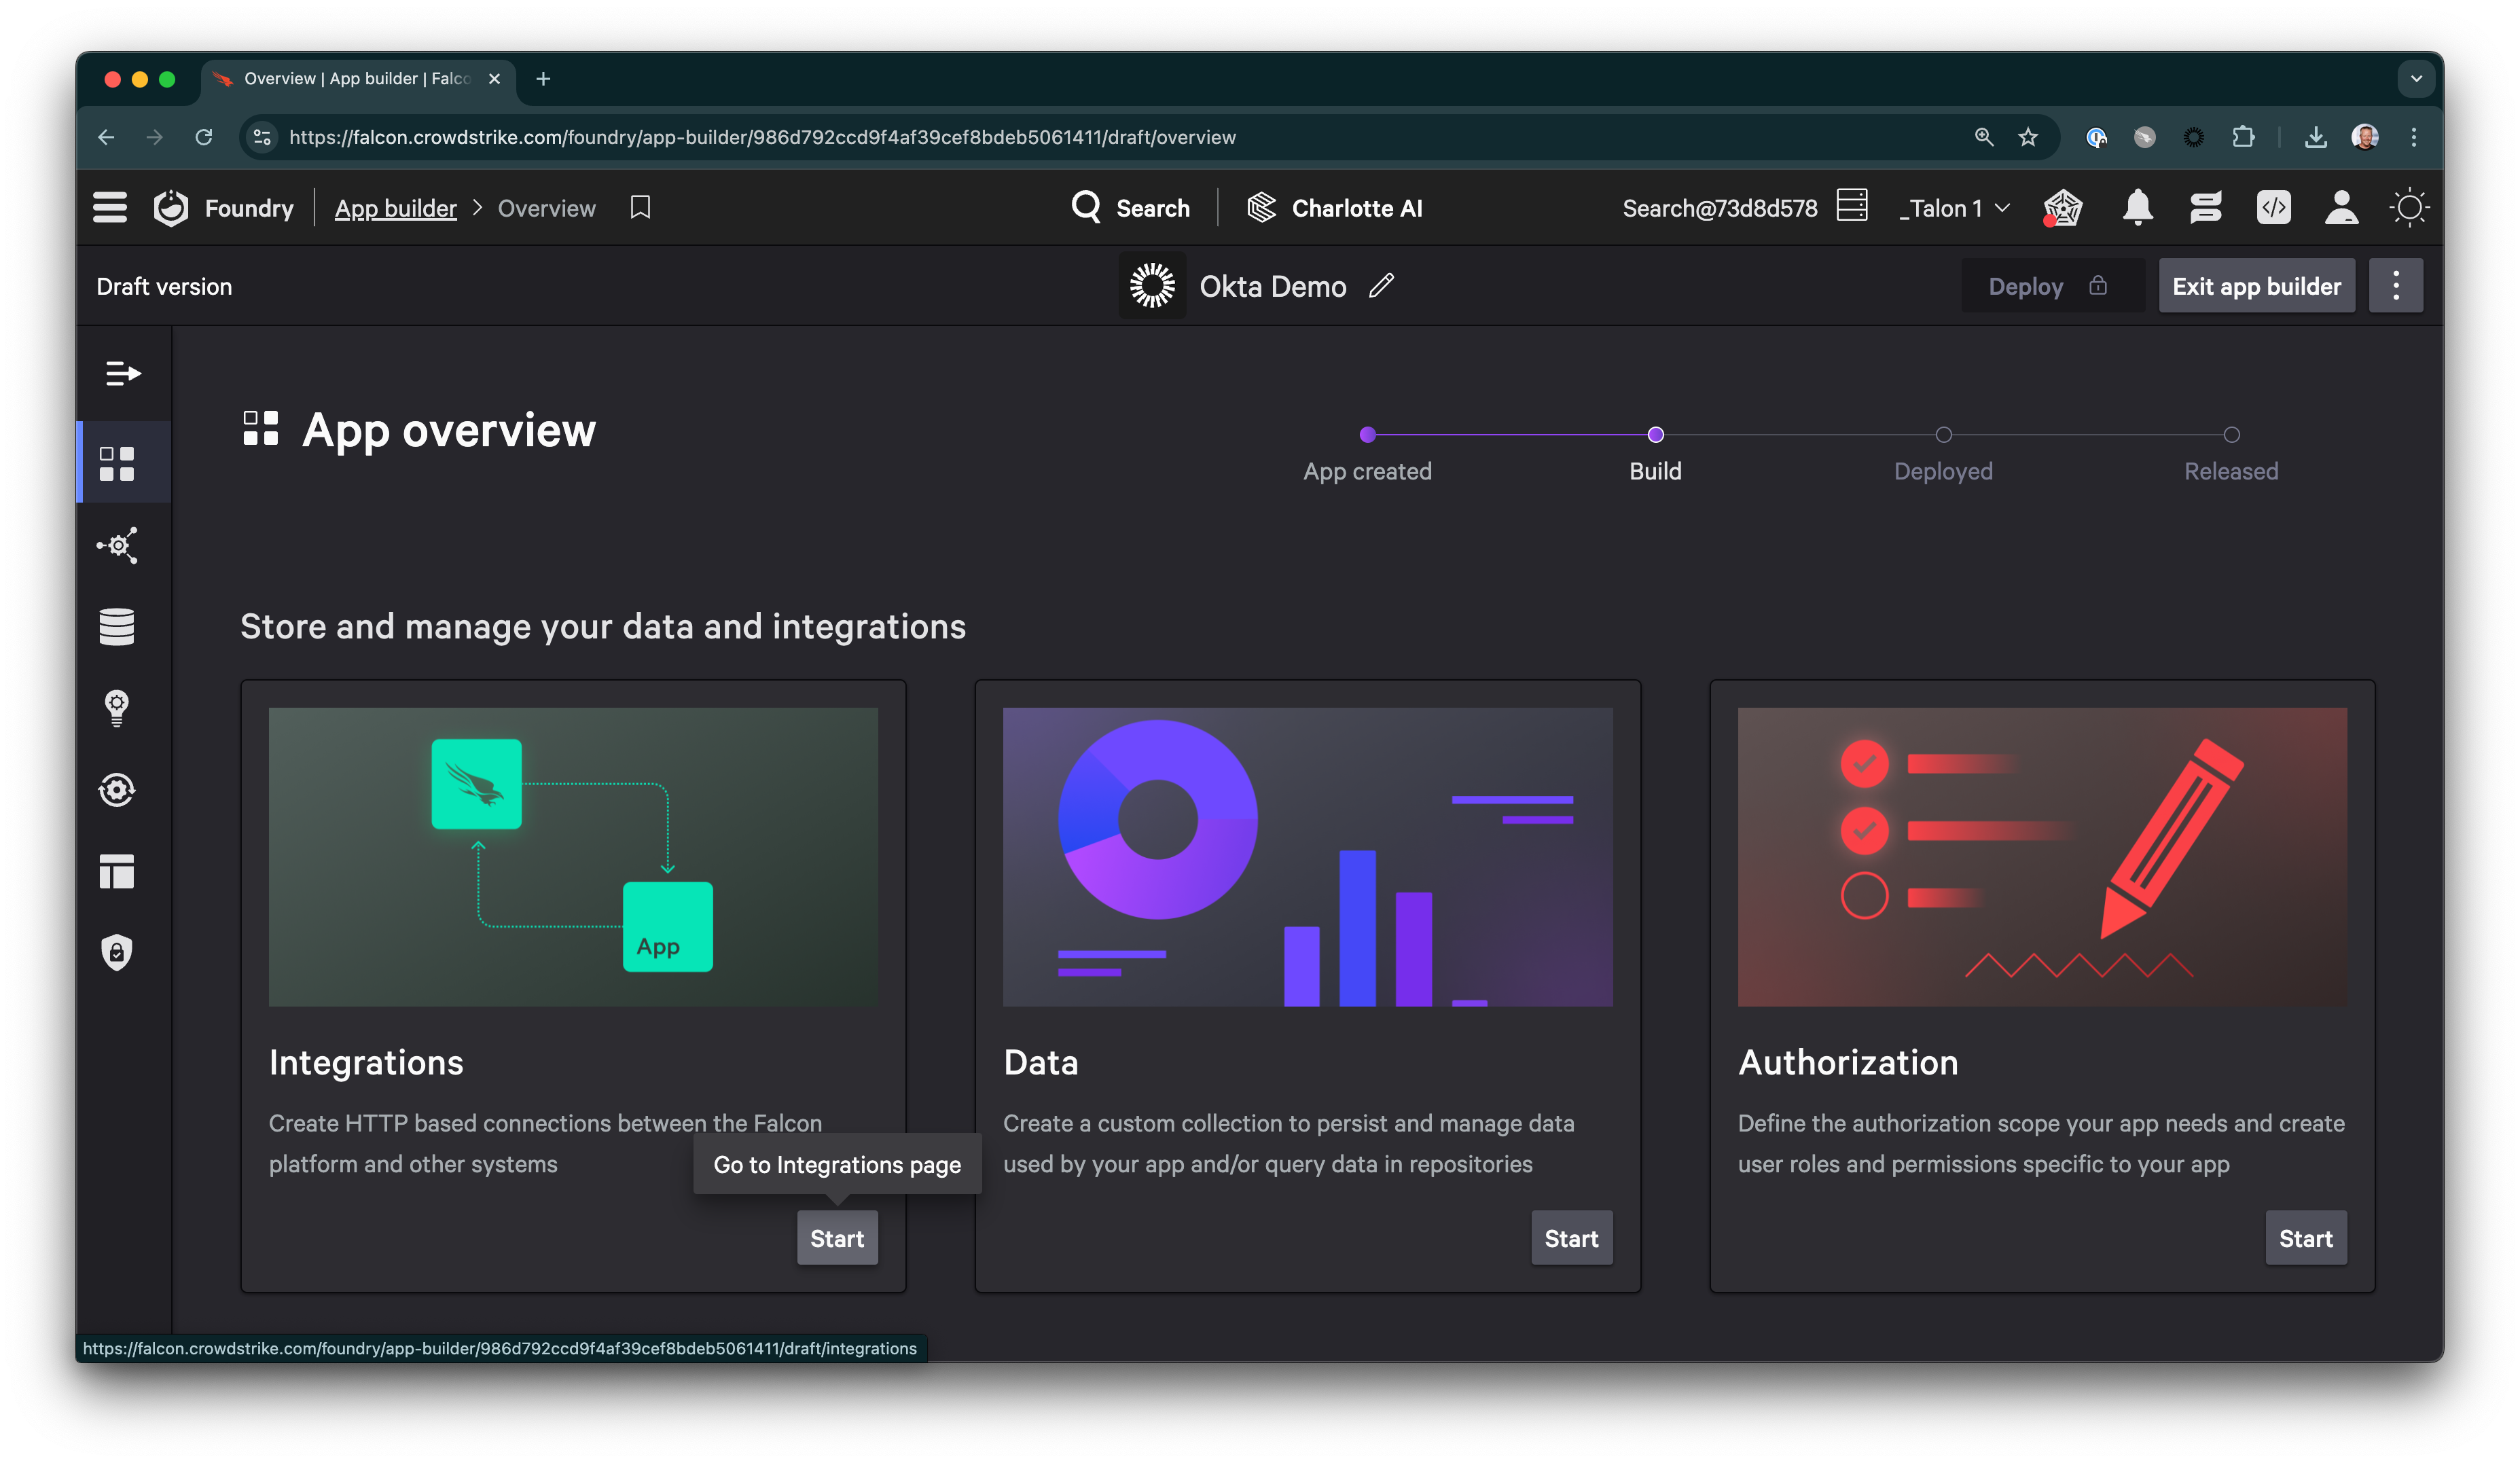
Click Create an API Integration and Continue to start from an OpenAPI specification.
Enter the following URL and Import.
https://raw.githubusercontent.com/okta/okta-sdk-java/refs/heads/master/src/swagger/api.yaml
After importing the operations, name the API profile Okta and scroll down to Auth type. Configure an API key authentication type as follows.
- API key parameter name:
Authorization - API key parameter location:
header - API key parameter prefix:
SSWS
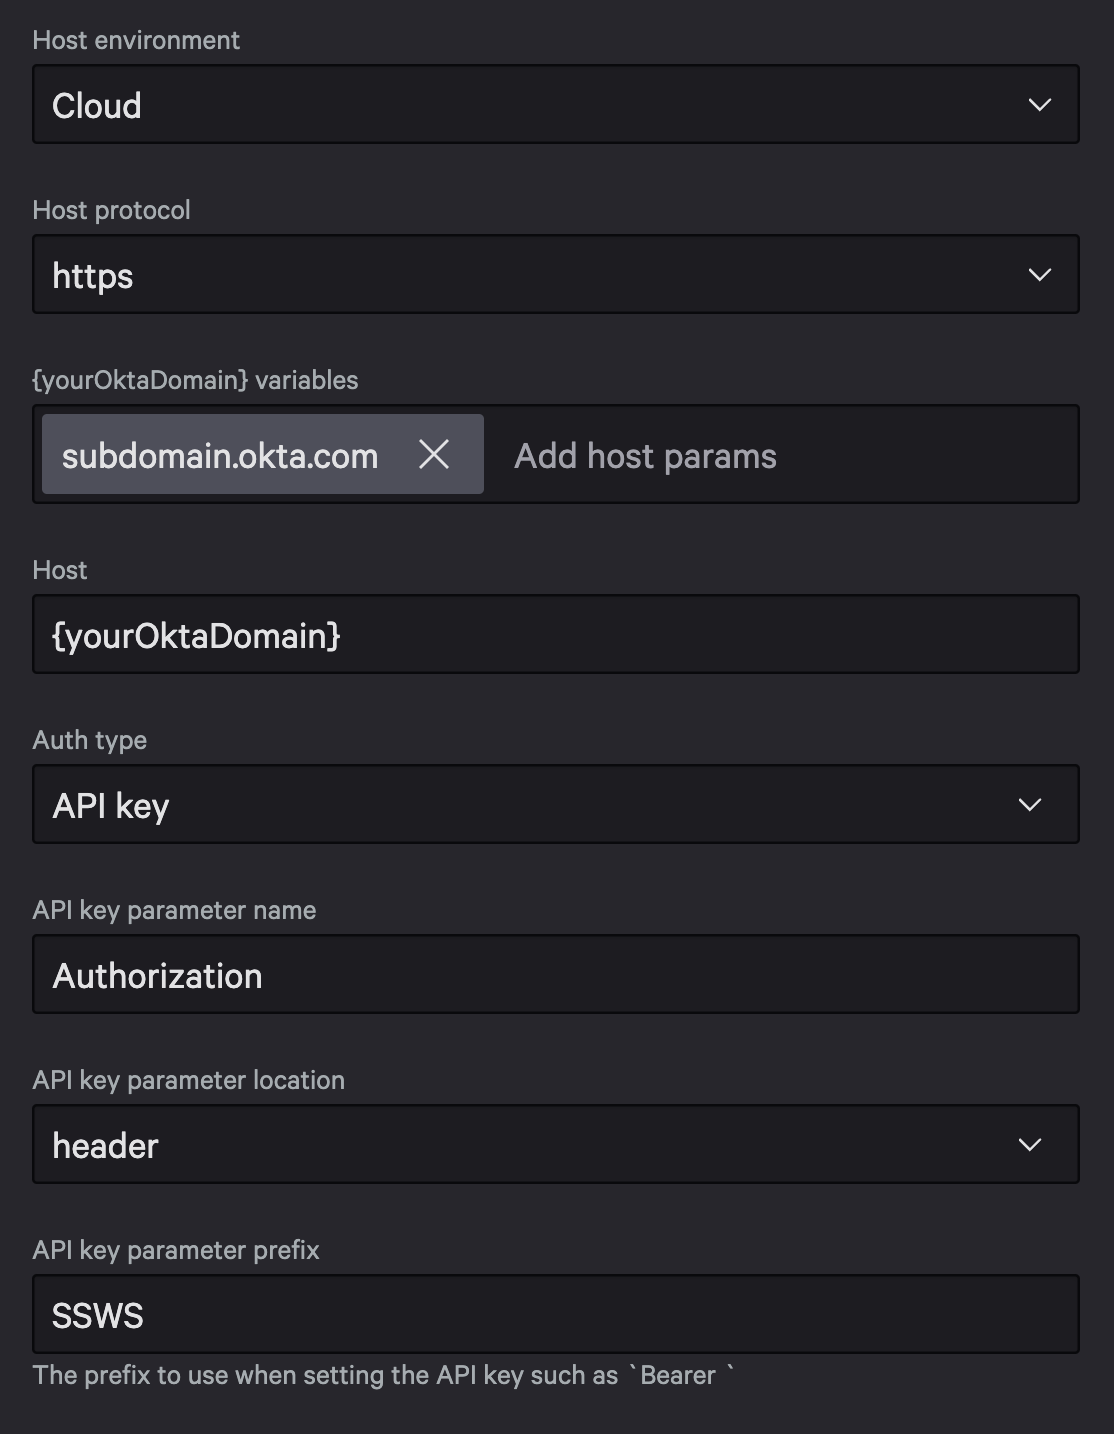
Scroll to the top of the page and select Save API integration.
If you don’t want to use Okta’s Open API specification, you can also manually create operations using their Users API docs. The Okta API reference portal shows the query parameters needed to list all users and deactivate a user, both of which this tutorial uses.
At the top of the Users API docs, it does have a warning:
Note: Some of the curl code examples on this page include SSWS API token authentication. However, Okta recommends using scoped OAuth 2.0 and OIDC access tokens to authenticate with Okta management APIs. OAuth 2.0 and OIDC access tokens provide fine-grain control over the bearer’s actions on specific endpoints.
Because of this advice, I figured out how to get client credentials working from the command line. Later, I discovered that private JWT authentication is not currently supported in Foundry when using OAuth. That’s why I chose the API key authentication mechanism above.
Create an Okta Developer Account to Test Operations
To get an API key from Okta, you can create a developer account if you don’t already have one. Log in to your admin console and go to Security > API > Tokens. Select Create token and answer as follows:
- What do you want your token to be named?
Foundry API - API calls made with this token must originate from
Any IP
Create the token and copy the value to somewhere safe, like to a new password field for your Okta Developer account in 1Password.
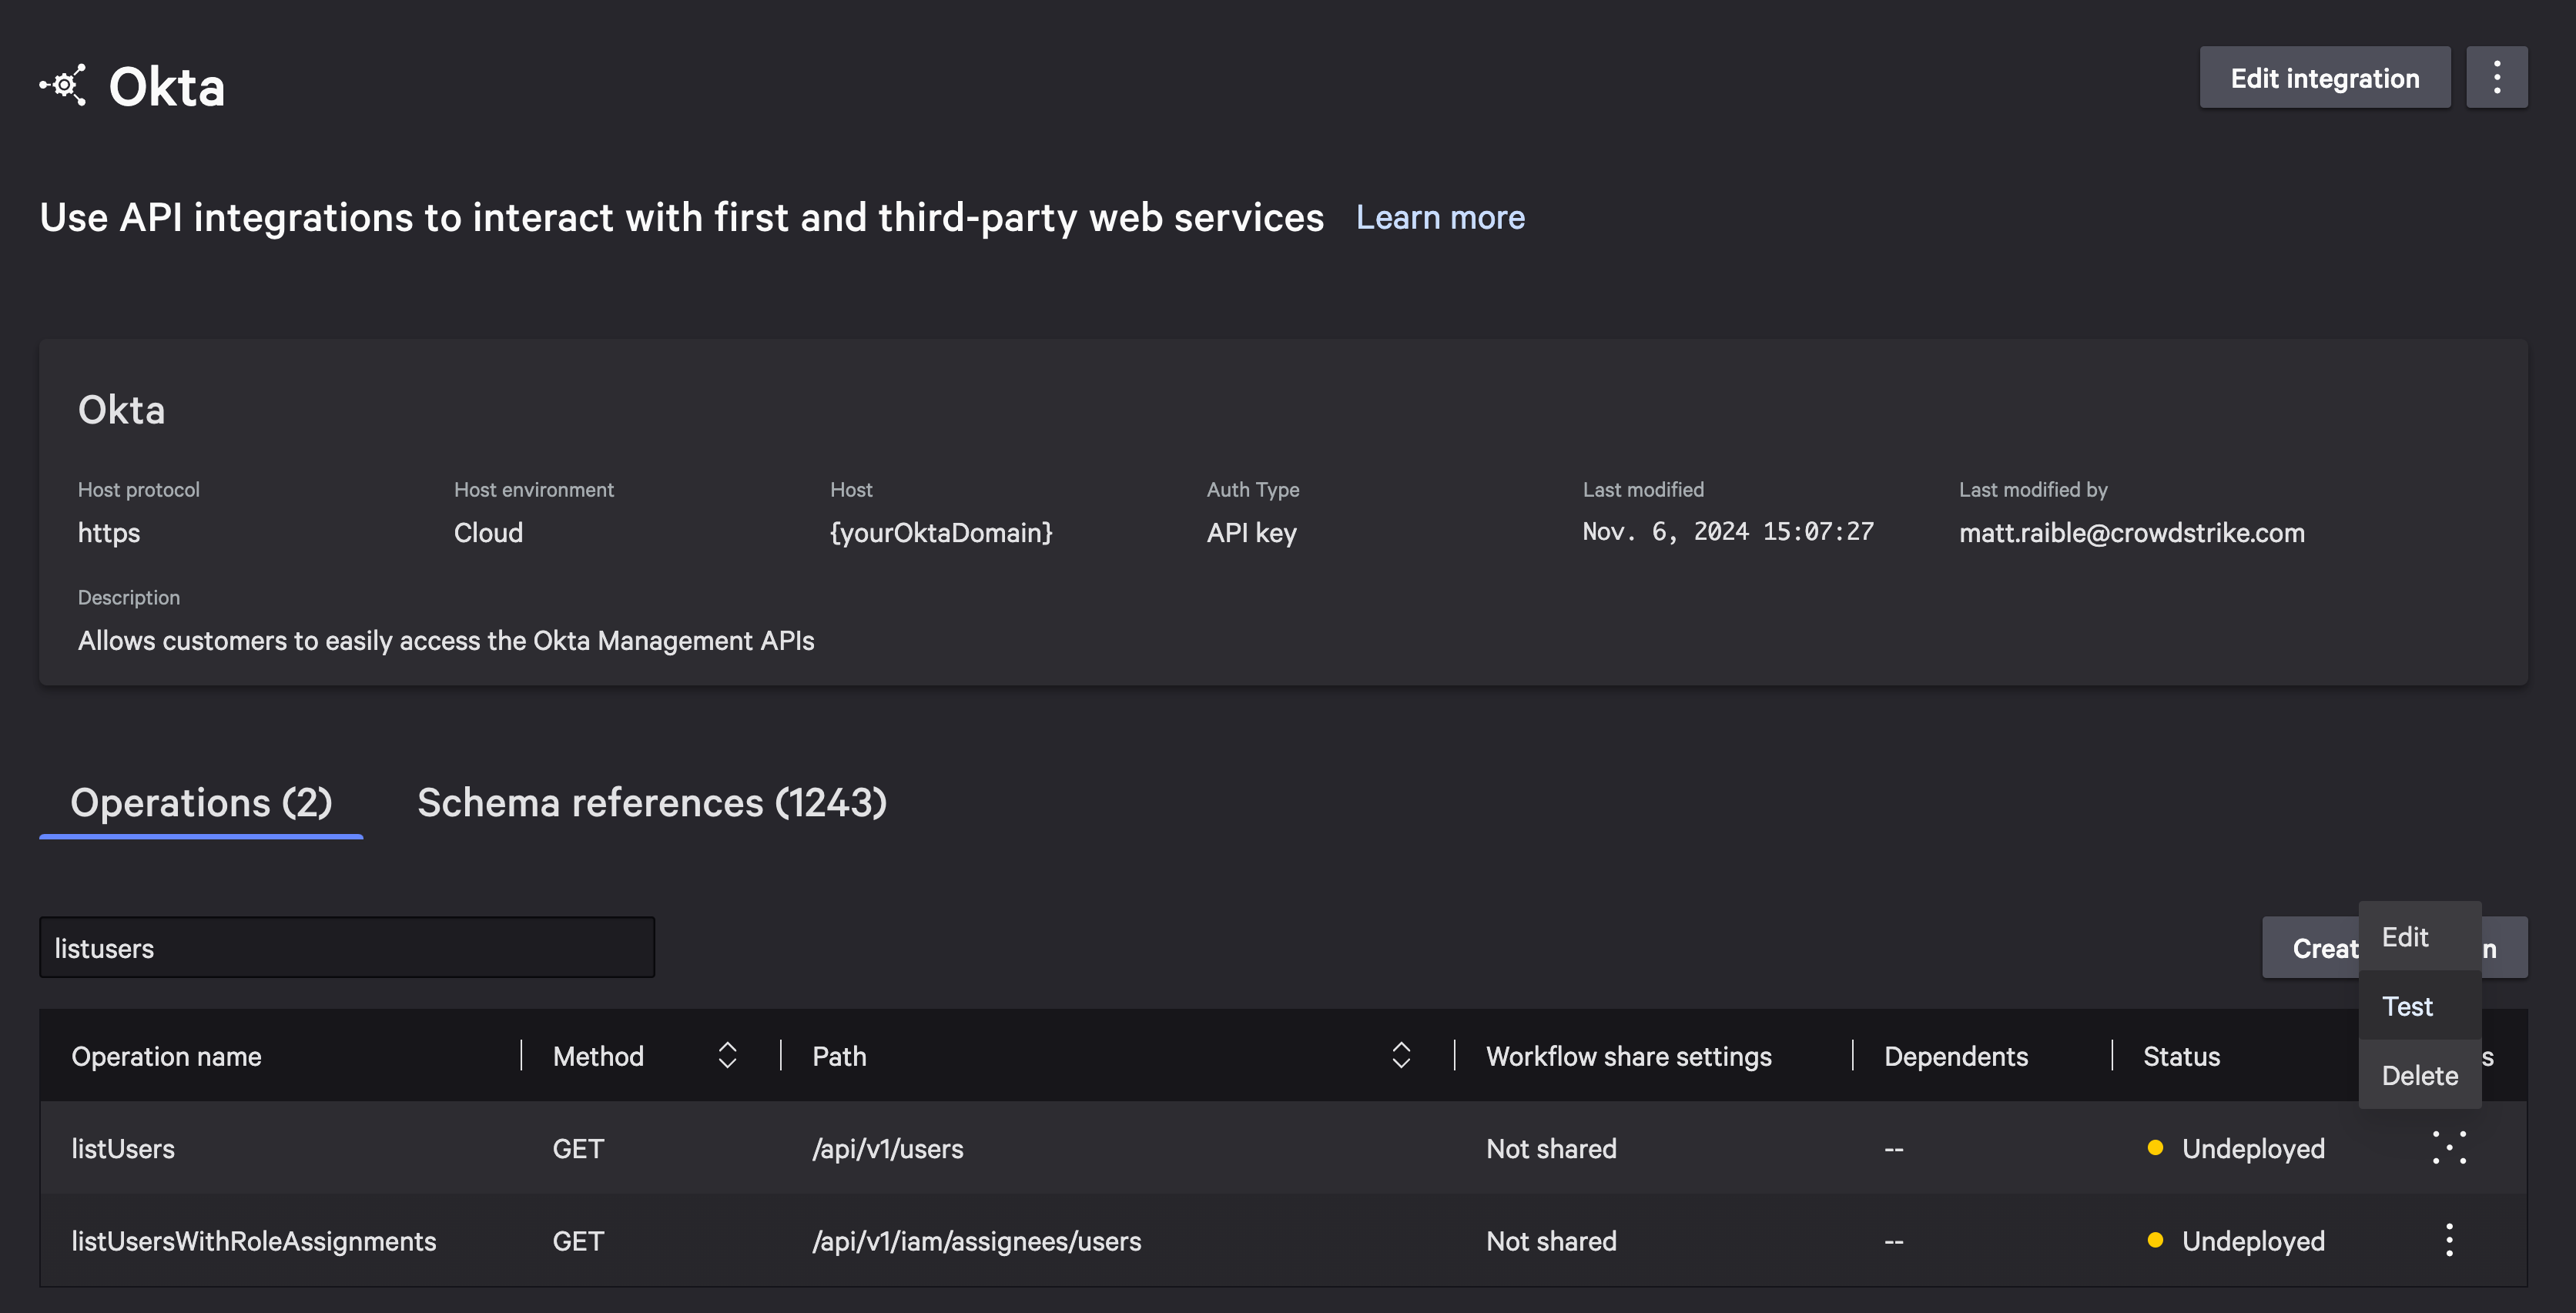
Go back to your Okta Demo app in Foundry and go to its API integration. Search for the “listusers” operation and select its Test action.
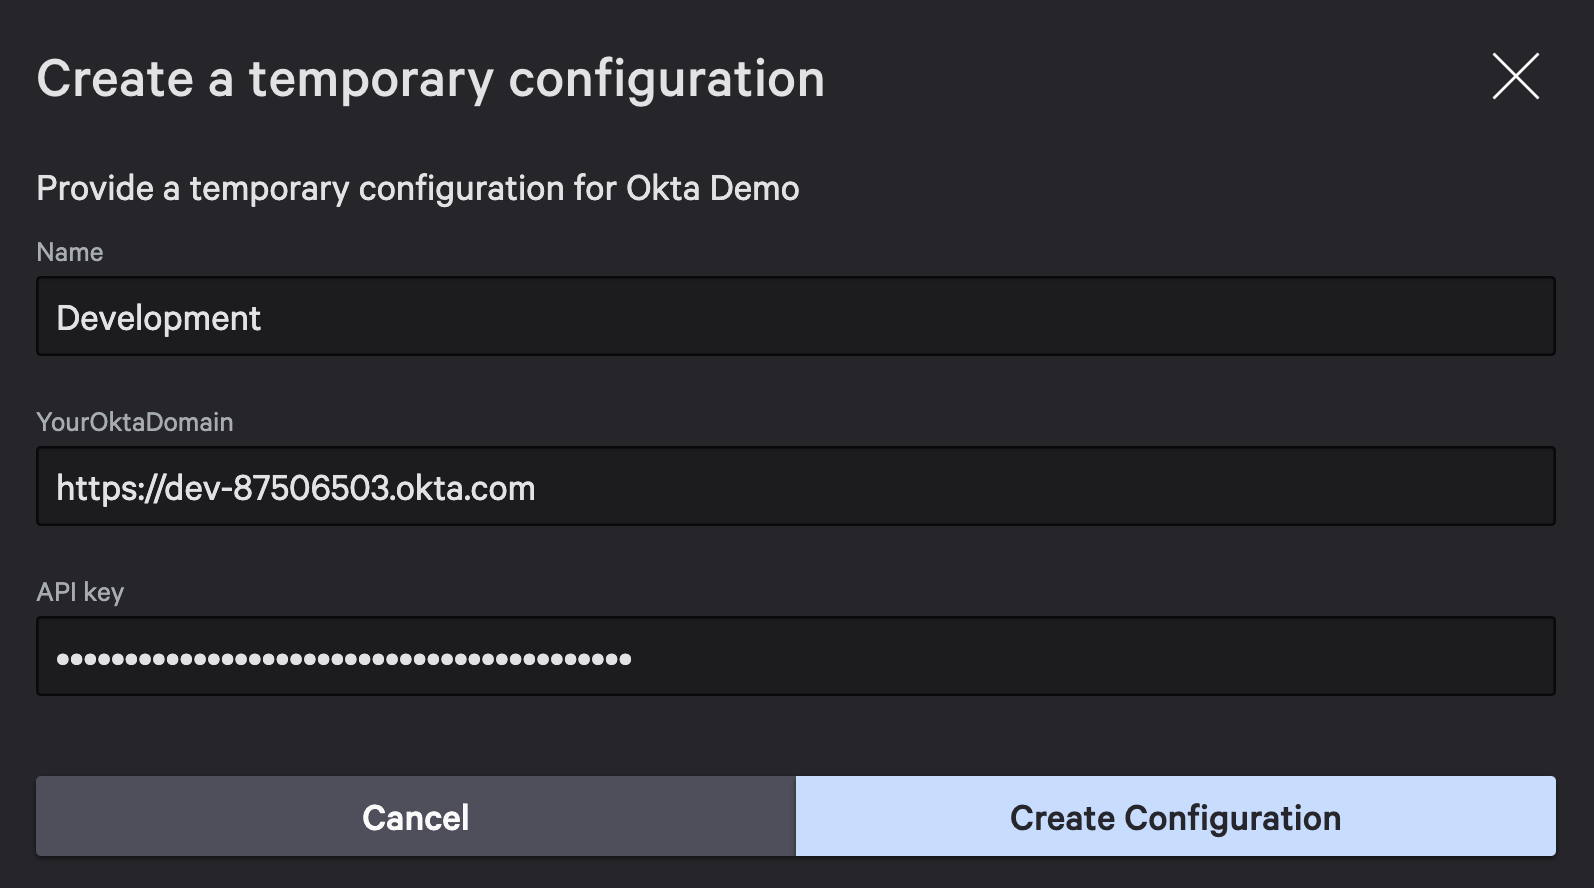
Create a temporary configuration to test API calls.
- Name:
Development - Tenant:
https://dev-[1-9].okta.com - API Key:
<token from okta>
Click Test operation and you should see a response with a status error at the top.
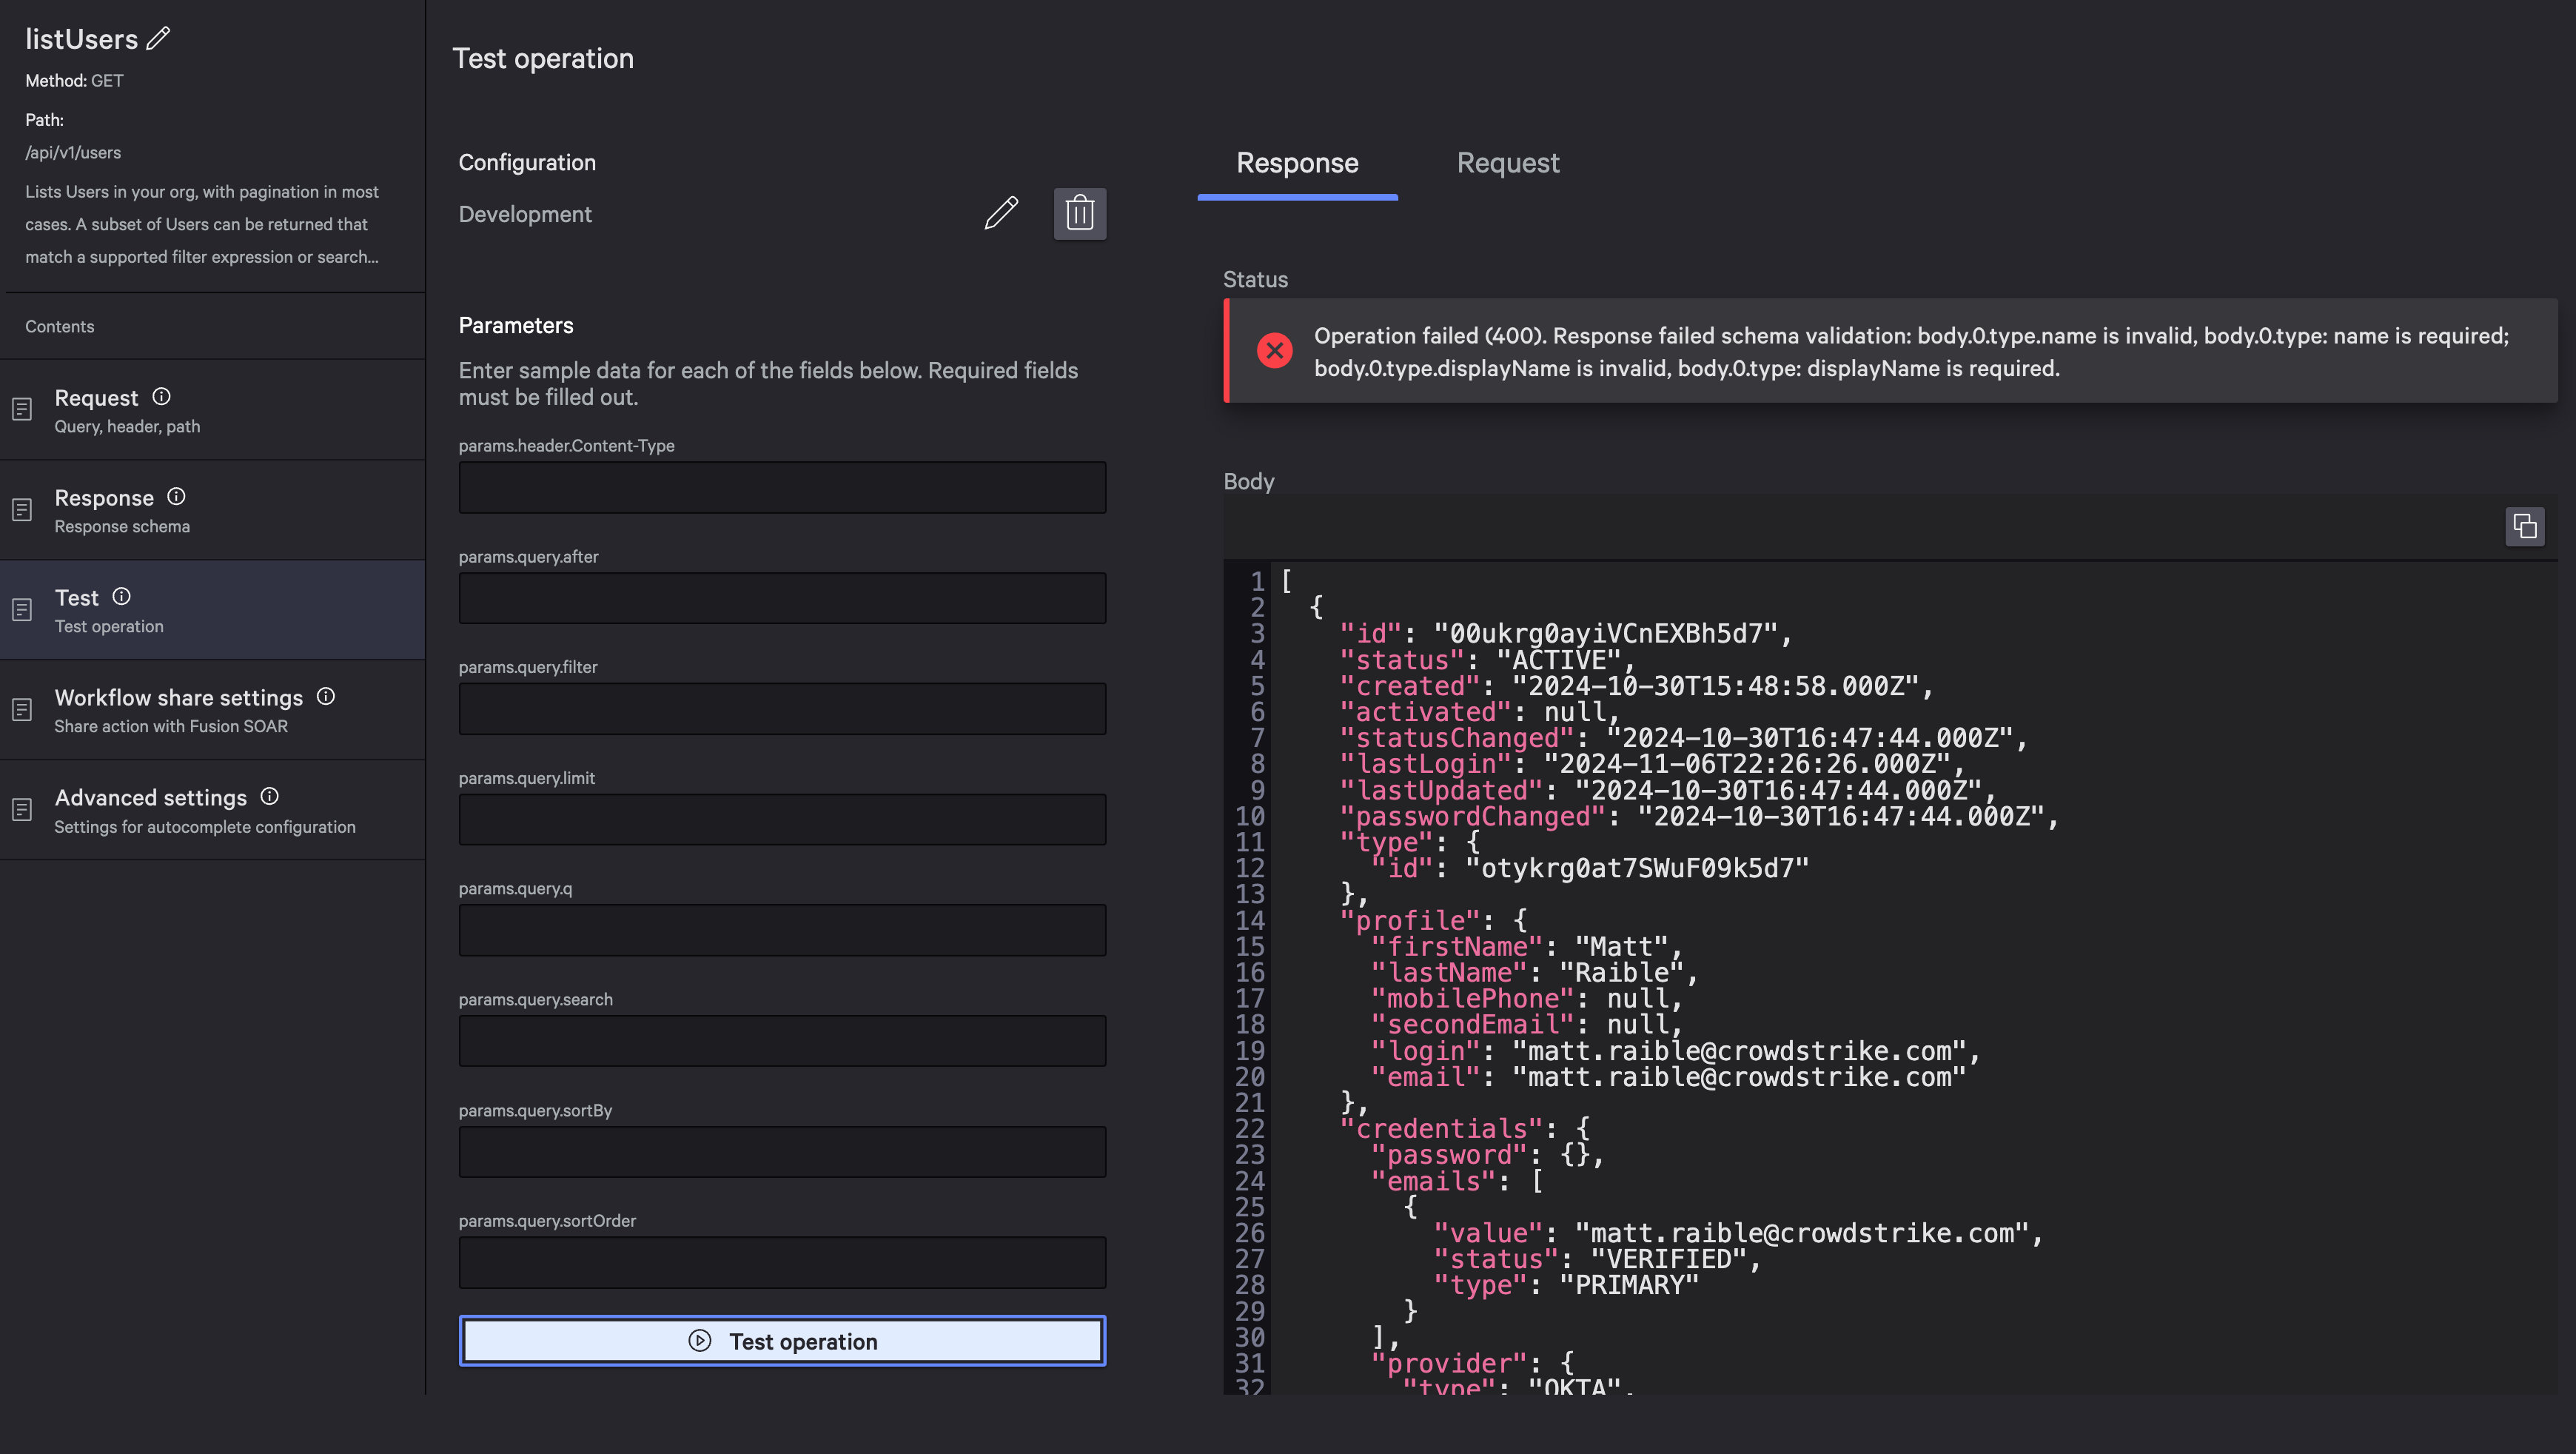
To fix the error, copy the body, go to Response > Response body > Generate schema. Paste the body and generate. Now if you test the operation, there will be no status error.

You can see the response headers below the body too.
Share Actions with Falcon Fusion SOAR
Go to Workflow Share settings to share your action with Falcon Fusion SOAR. Use the defaults for the display name and description. Add Okta as a tag and Save.
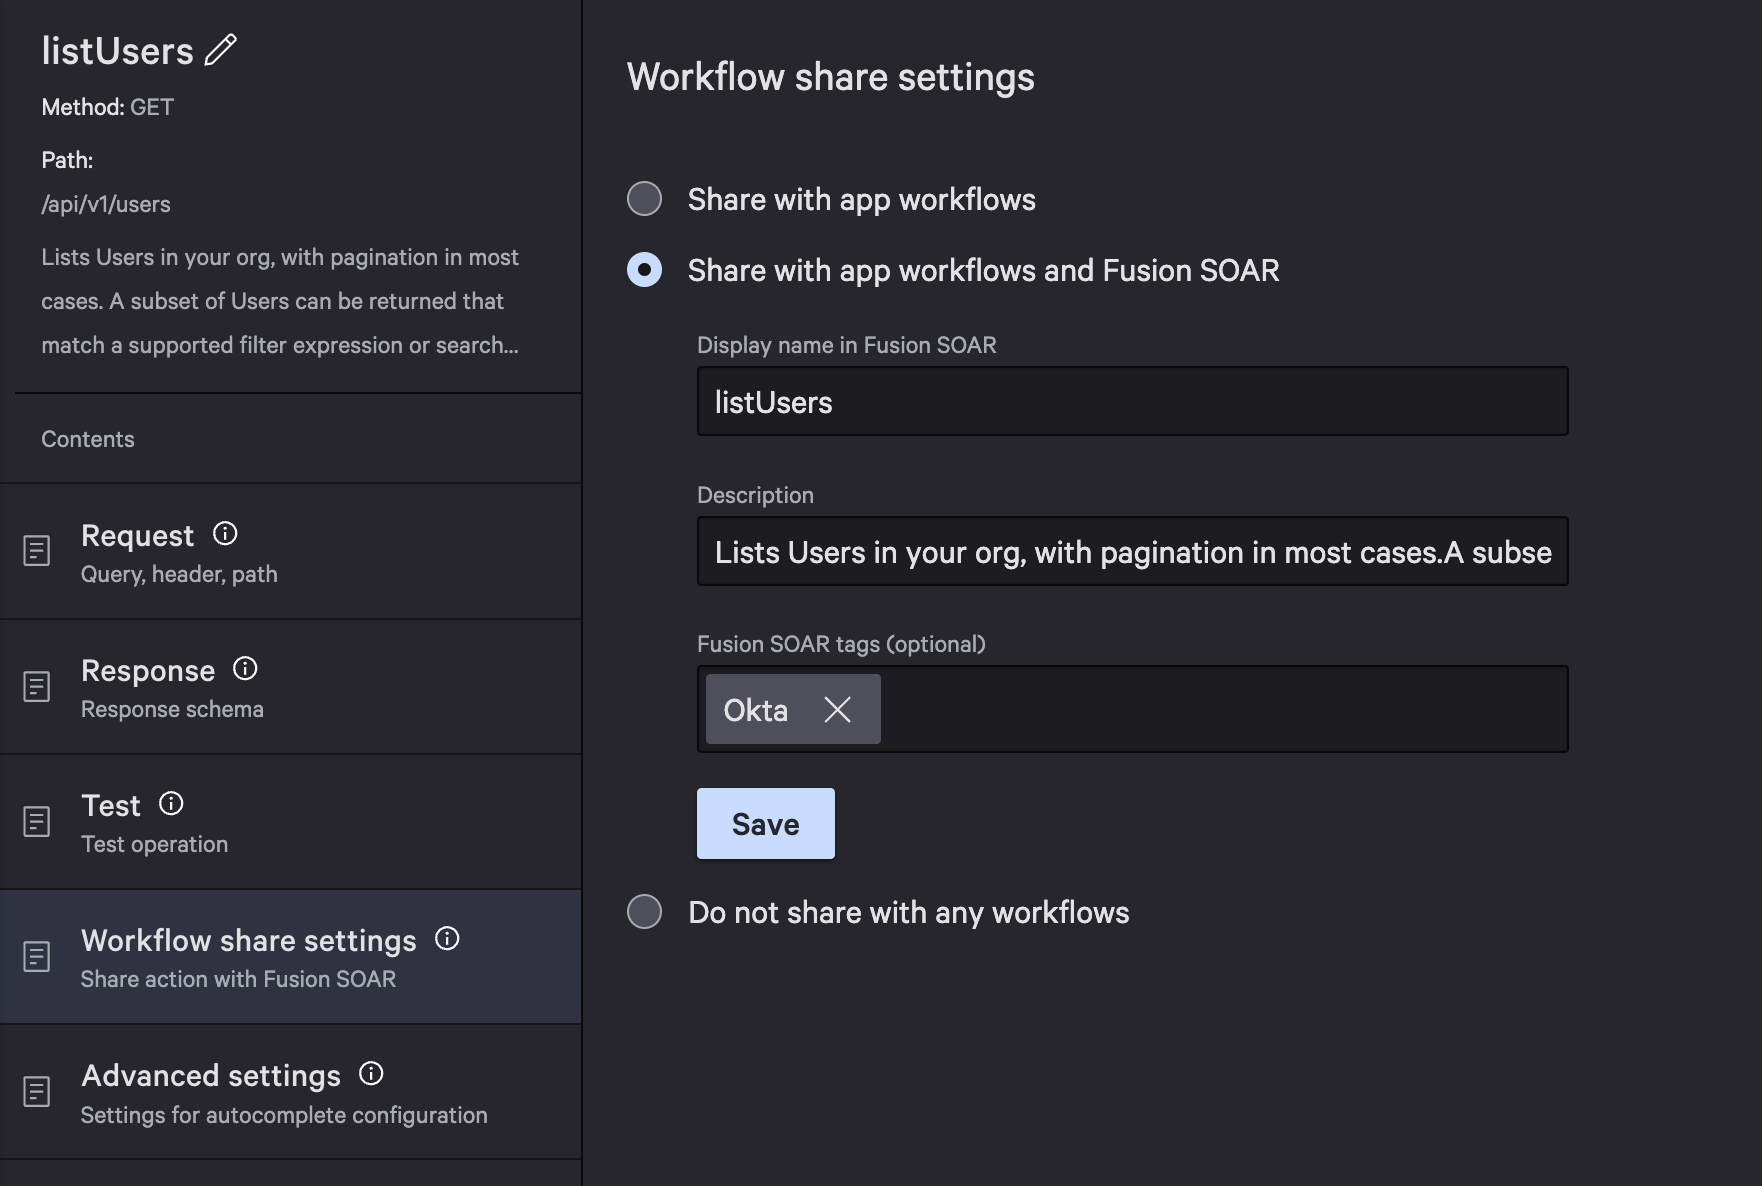
To configure autocompletion for input fields (to show a user’s email instead of their ID), go to Advanced settings and use the following values.
- Array field:
root response - ID field:
id - Display field:
profile.email
Note
If you only seebody in the Array field dropdown, the response schema needs updating. Copy the response sample from Okta’s API documentation to Response > Response body > Generate schema to fix it. You may have to refresh the page after this value saves. Then, configure Advanced settings as recommended above.
We’ll come back to this to understand the purpose of autocompletion in a minute.
Return to your integration and search for the “deactivateuser” operation. Edit it to share it with Falcon Fusion SOAR and add the Okta tag. You’ll need to trim down the length of the description to be shorter too. After saving, press Done.
Deploy your Okta Integration
Save all your work by deploying your Okta Demo app. Select Deploy and type in your changes. For example:
- Change type:
Minor - Change log:
First release with Okta API integration
By deploying this app, you’ve created a new, immutable, version of your application. That deployment can be tested before it’s released to your end users.
Exit App builder and you’ll see your deployment in the Deployments tab.
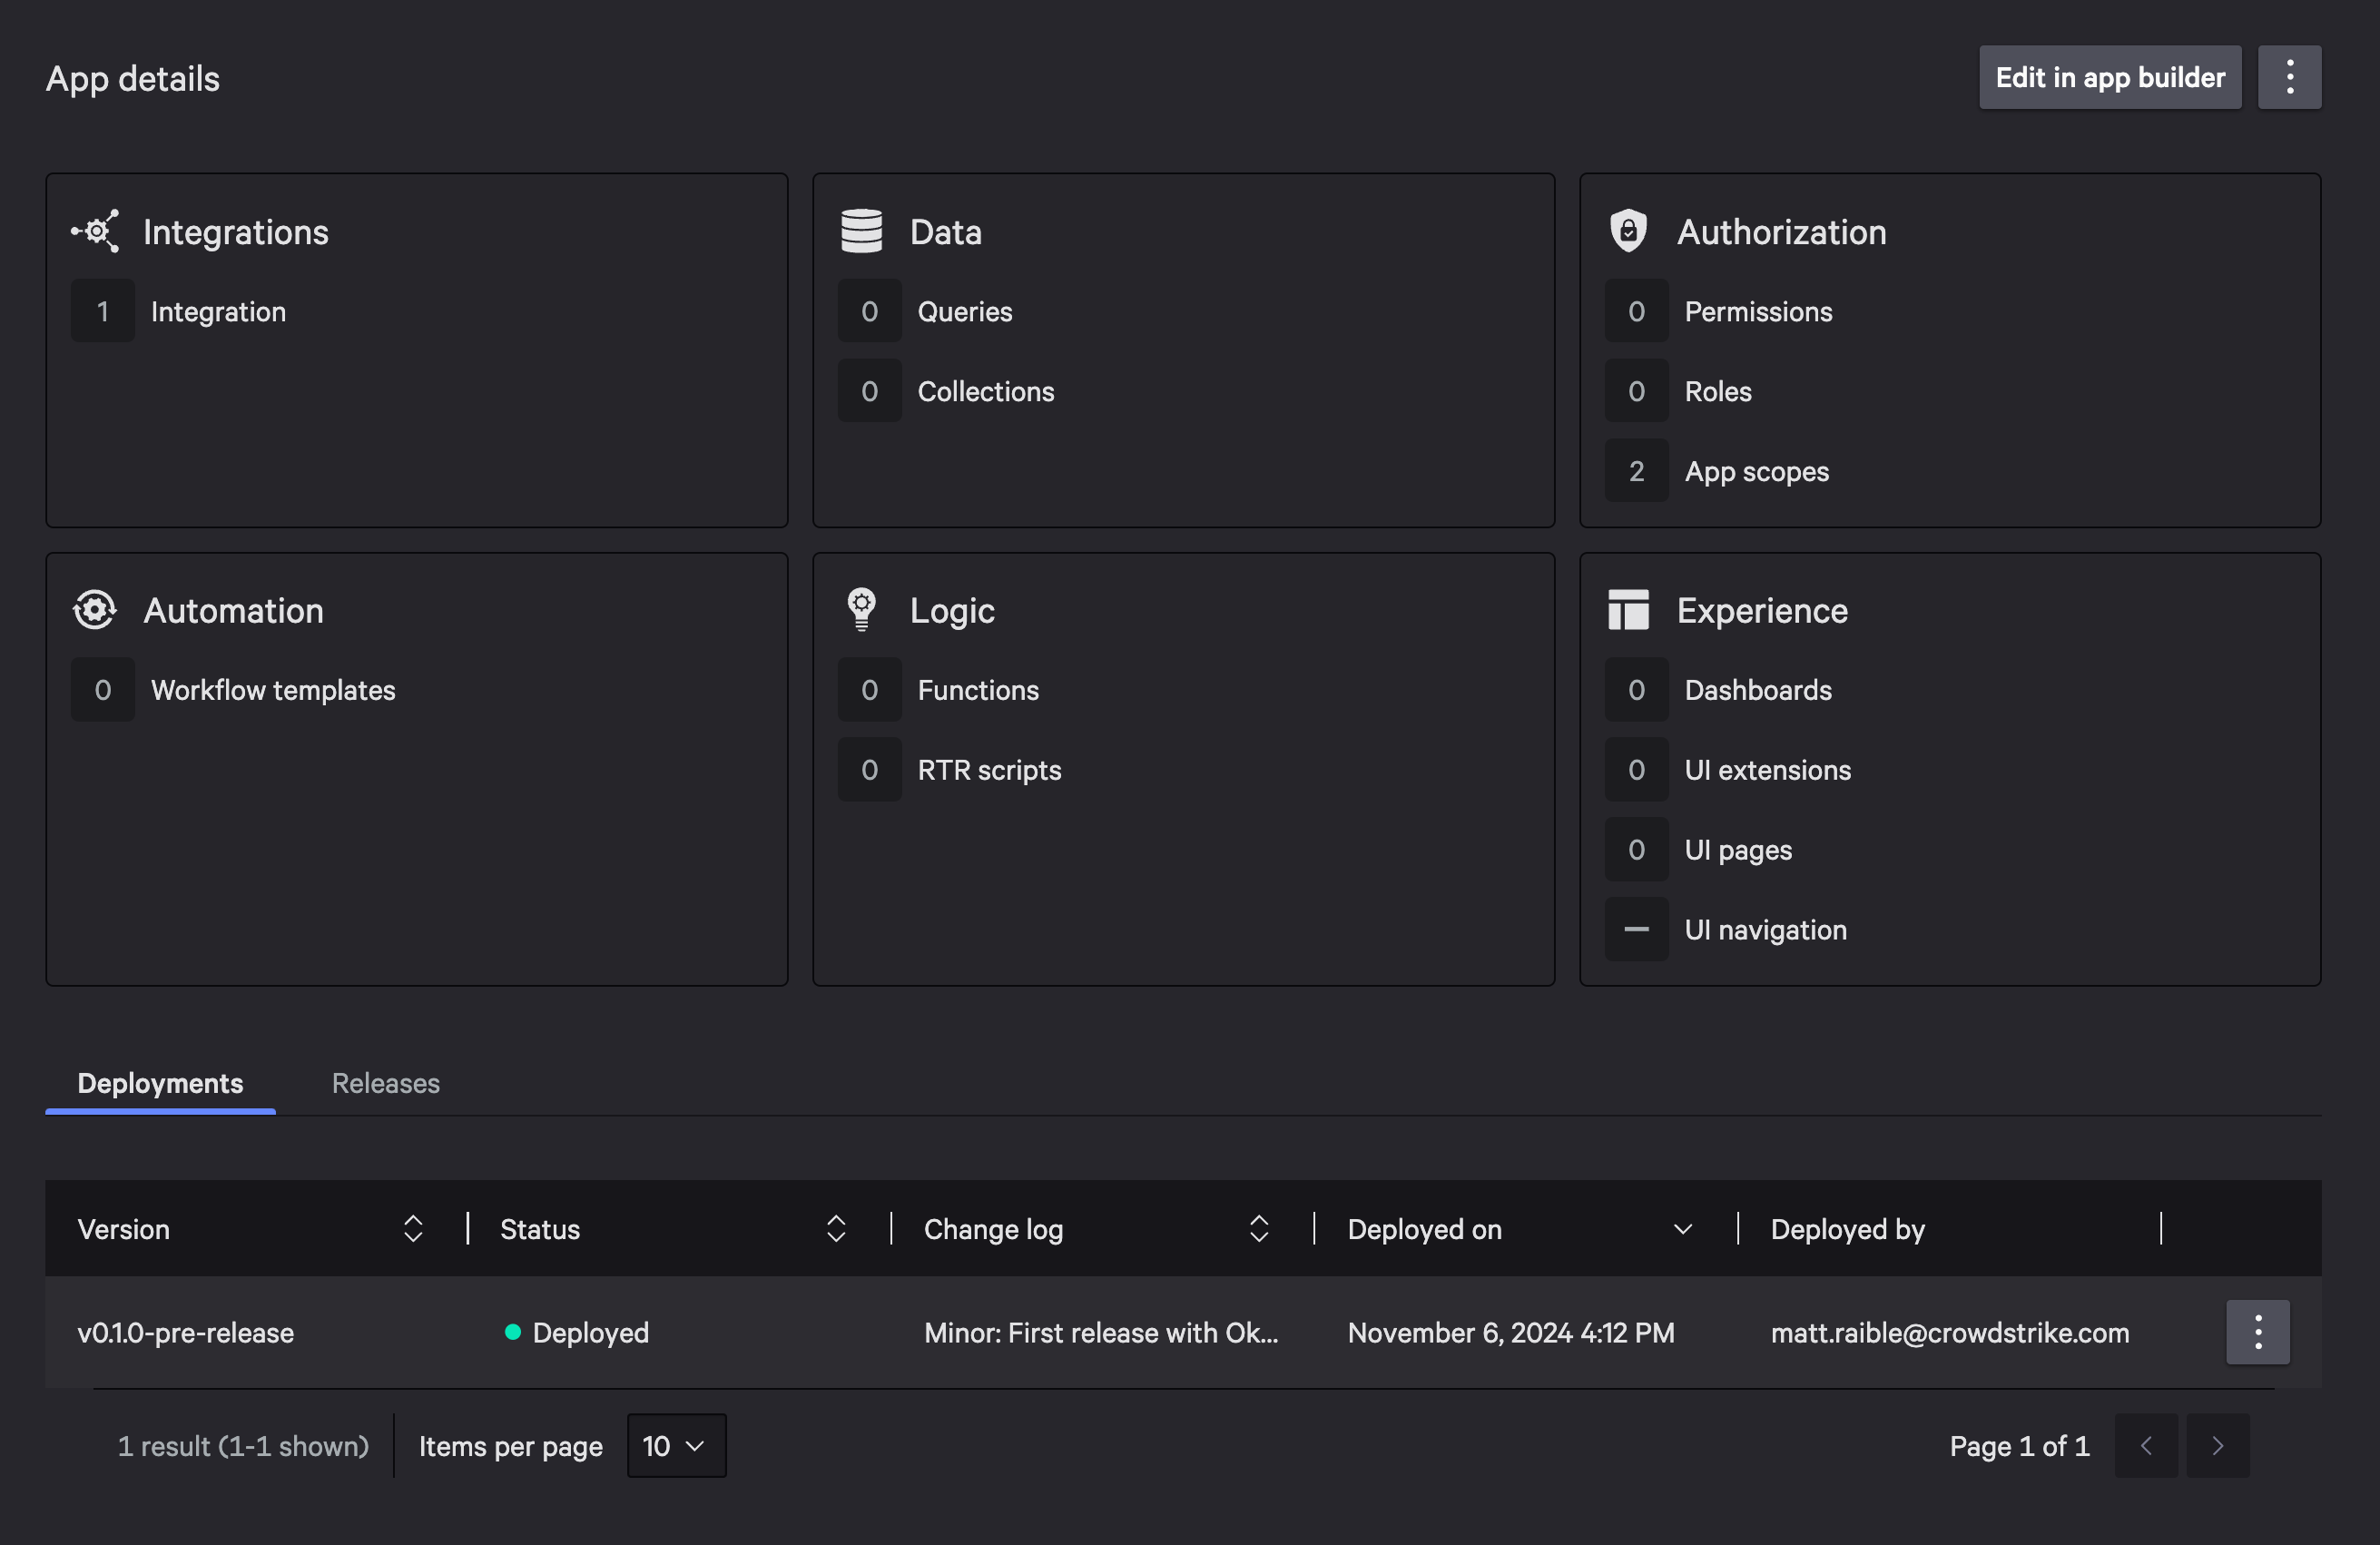
Now let’s make use of the custom Okta User actions in Falcon Fusion SOAR.
Add a Workflow in Falcon Fusion SOAR
Go to Fusion SOAR > Workflows, create a new workflow from scratch, and click Next.
Select Scheduled workflow for the trigger, then choose Hourly and your time zone. Add an action to the trigger.
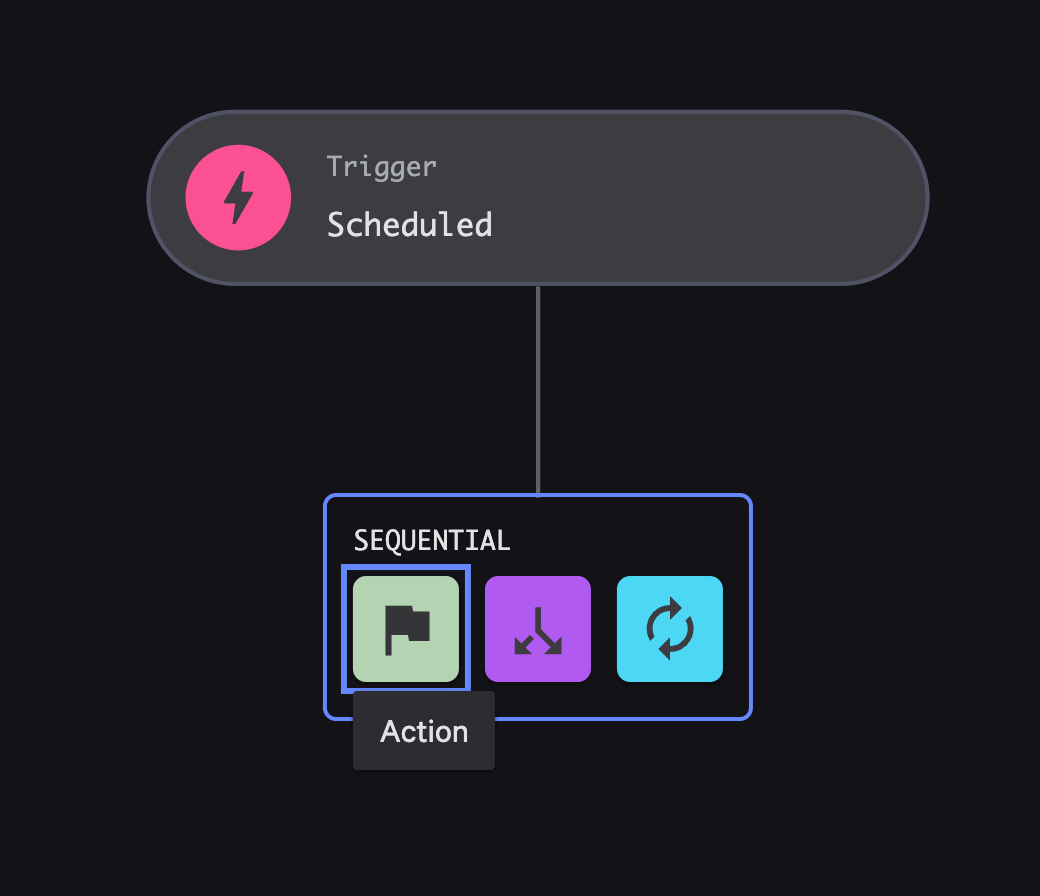
If you search for Okta as an action name, you won’t see any results. This happens because the Okta Demo application you created in Falcon Foundry isn’t released or installed yet.
This is where Foundry’s developer tools can help. Click the </> icon in your navbar and turn on Preview mode. This setting allows you to see deployed apps that haven’t been released. Select Okta Demo and v0.1.0-pre-release in the top left. When previewing, it’s pinned to your user so no other users can see what you’re seeing.
Now you should be able to search for and add listUsers as an action. Toggle off the preview mode and click Next, followed by Save and exit. Enter your workflow details:
- Name:
List Okta Users
Go to Foundry > App manager, open the actions menu, and select Release app.
- Change type:
Minor - Notes:
Release it to everyone
Click View in app catalog and install the app. You’ll be prompted to configure your API key. Enter your credentials:
- Name:
Okta API Key - Tenant:
https://dev-[1-9].okta.com - API Key:
<token from okta>
It may seem that having both ‘deploy’ and ‘release’ process steps is redundant but this is by design as the person or team developing the app may not be the same person or team installing it. This process provides isolation for the developer implementing the action from the other users within the CrowdStrike account/CID who may be using a previous version of that action, allowing for testing and troubleshooting before the action is generally available for the rest of the account’s users.
Now, jump back to Fusion workflows and edit the List Okta Users workflow. Select the listUsers action, choose Okta API Key for the credential profile. Leave the rest of the parameters empty.
Next, add a loop over the body. The body is an array of objects and each object is a user. Use the following values:
- Loop type:
For each - Loop source:
Body - Processing order:
One after the other / sequentially
Add a sequential action to the loop so it writes the output to LogScale. Search for “write” and select Write to log repo.
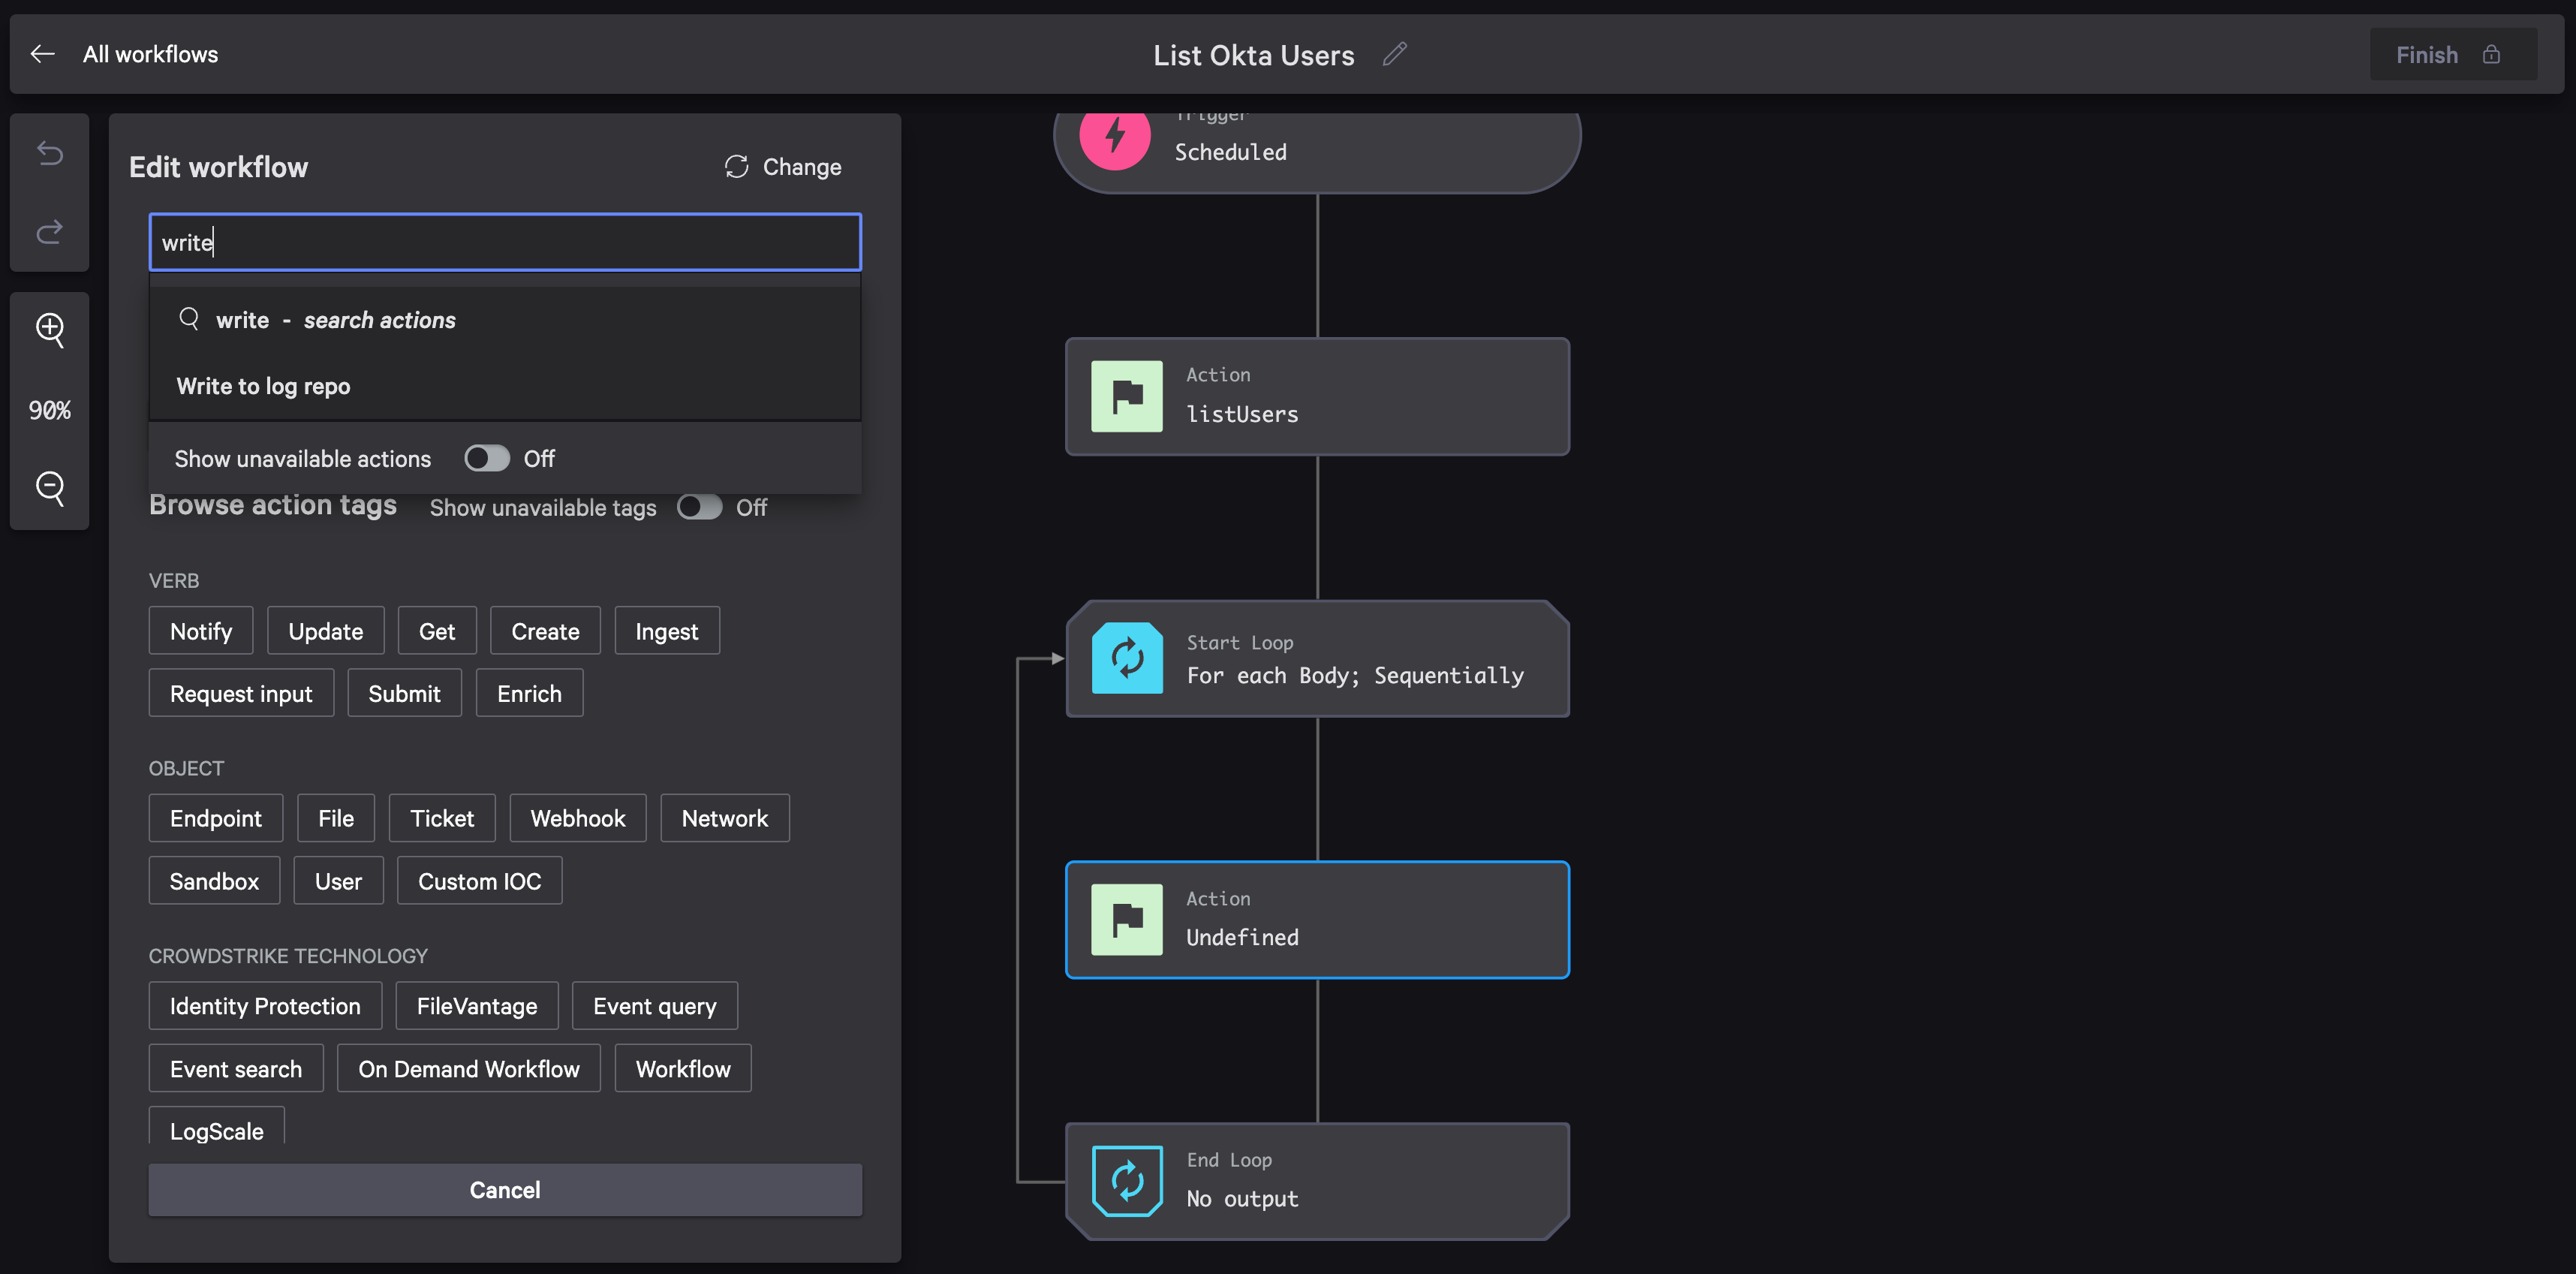
TIP: Scroll up and down with your mouse to increase and decrease the size of the workflow diagram. To move the diagram on the screen, click and drag with your mouse.
In the Configure section, you can specify individual field data to include. Select LastName, FirstName, and Email instances. Then, define custom JSON data so the result is formatted in a way that’s more conducive to how you want to index it in LogScale.
The JSON below uses a simple ECS (Elastic Common Schema) template. It defines the event, provider, and user with variables that will be interpolated. Copy it into the Custom JSON data field.
{
  "event": {
    "kind": "UserState",
    "provider": "Okta"
  },
  "user": {
    "email": "${Email instance}",
    "first_name": "${FirstName instance}",
    "last_name": "${LastName instance}"
  }
}
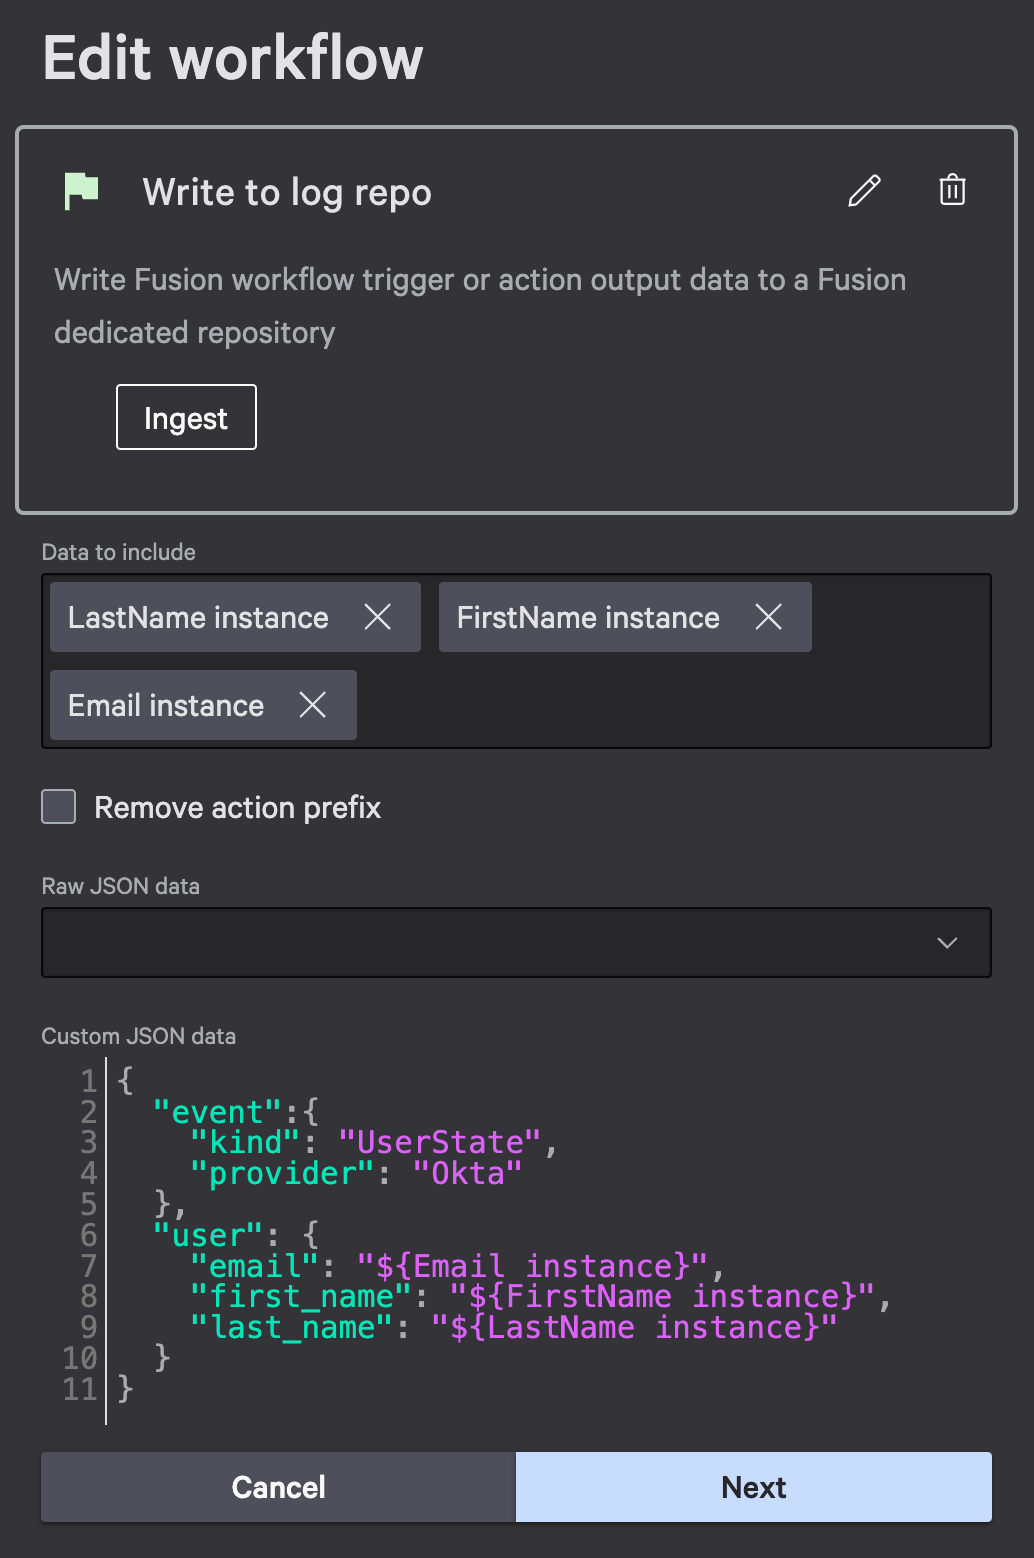
Select Next and Save and exit to complete the workflow creation process. Update the workflow with Add write to LogScale action as a comment and set the status to On.
Before executing this workflow, add a few sample users to your Okta org at Directory > People > Add Person. I added the starting five from a local basketball team to my directory.
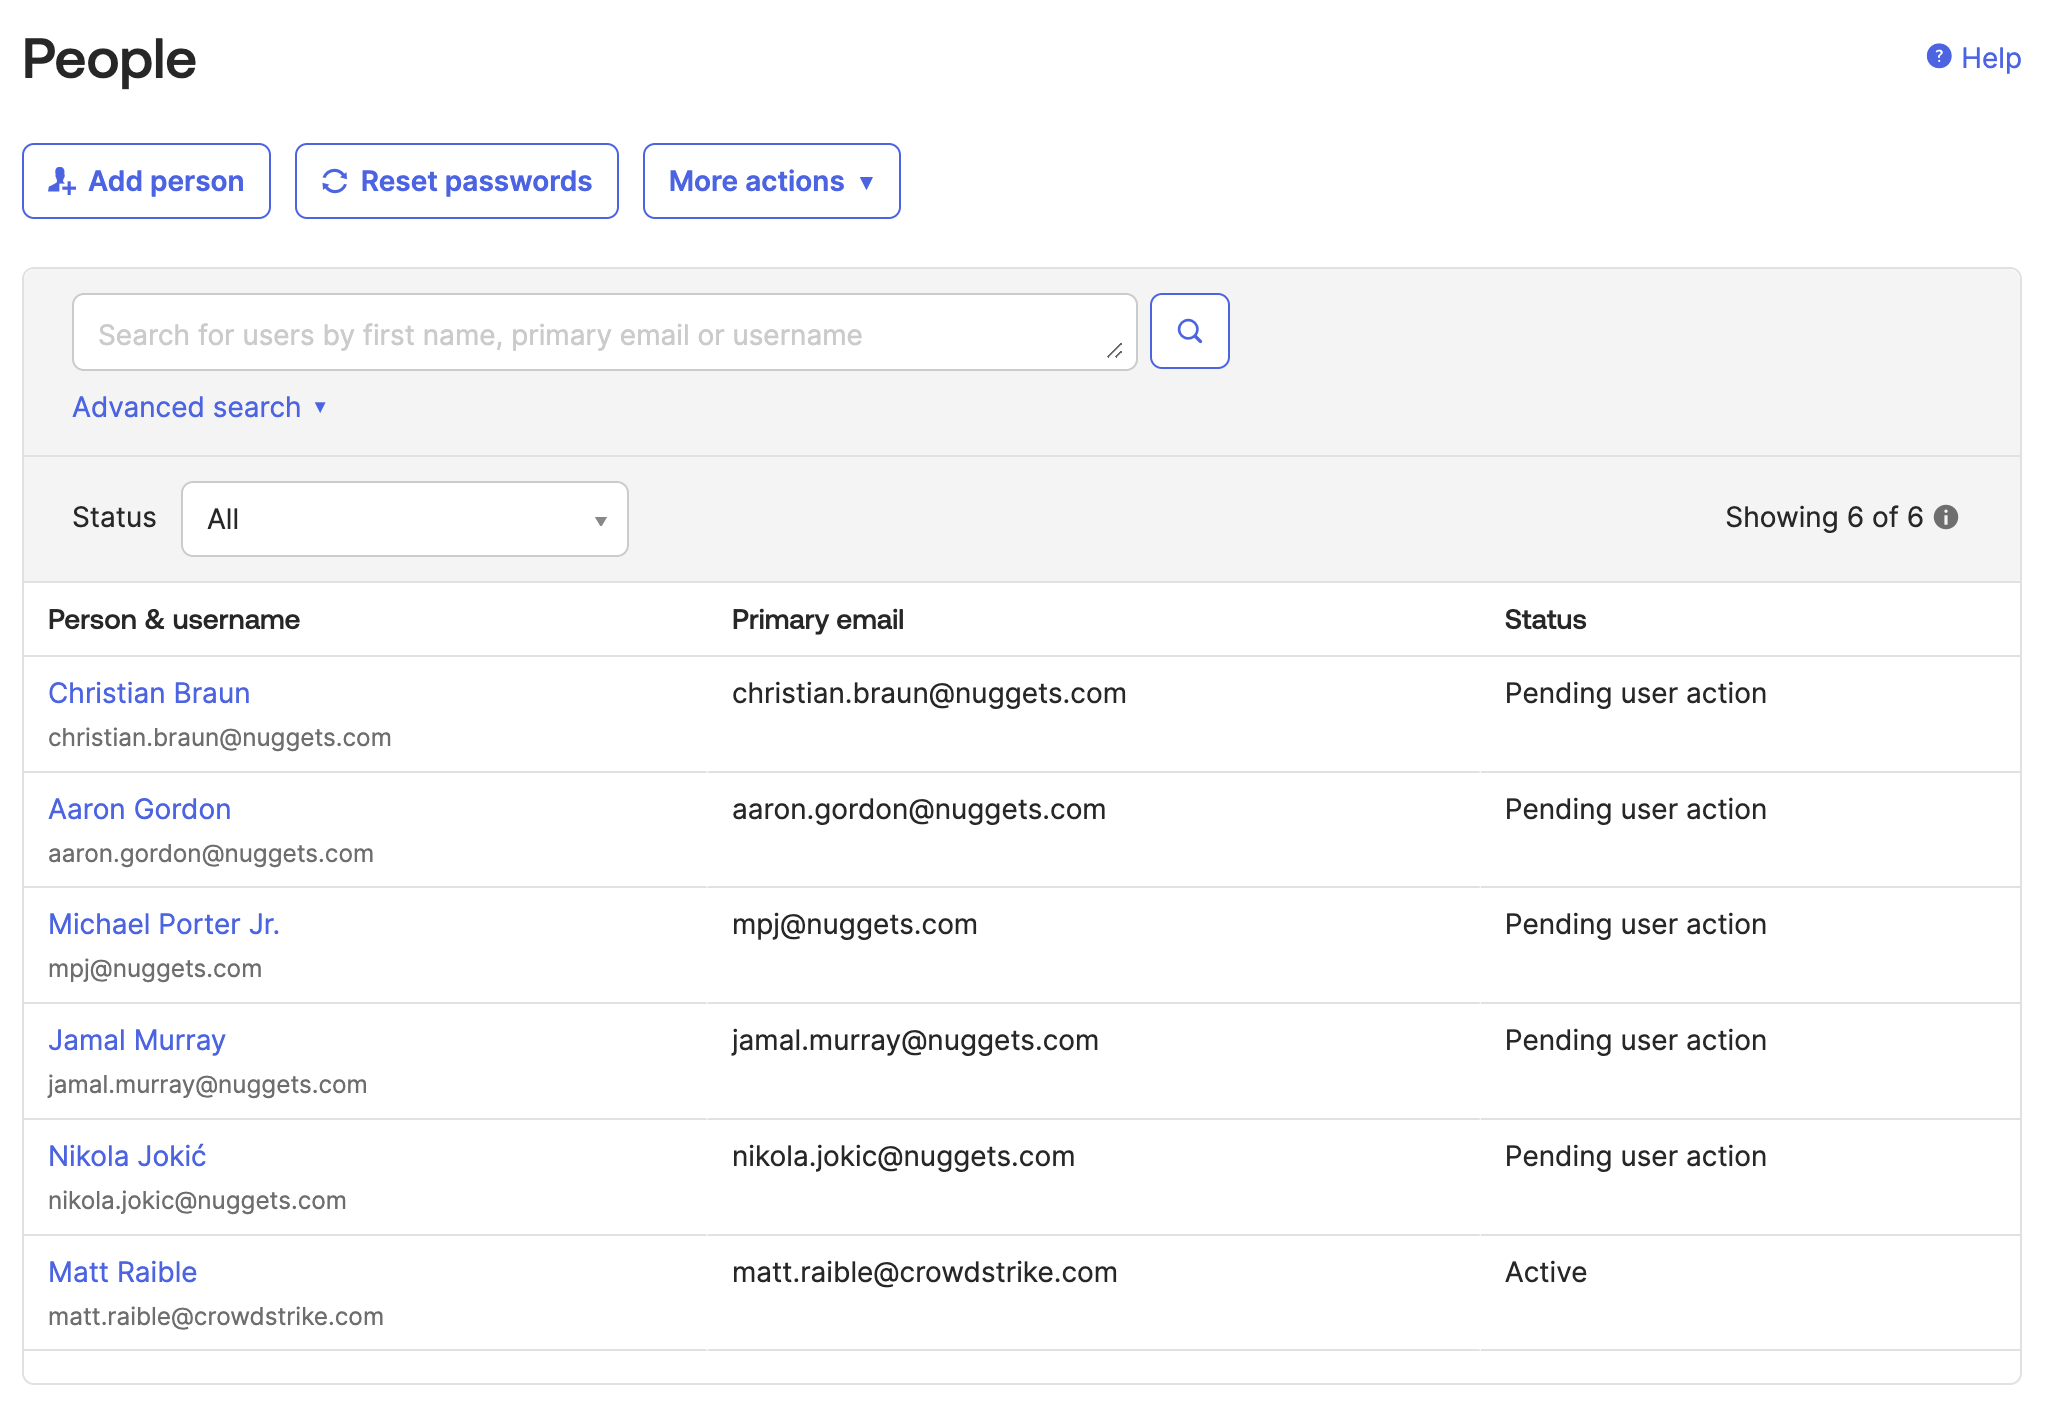
Note
You could also use the “createUser” operation in your Okta API integration, but the number of required parameters is extensive.Execute the Workflow
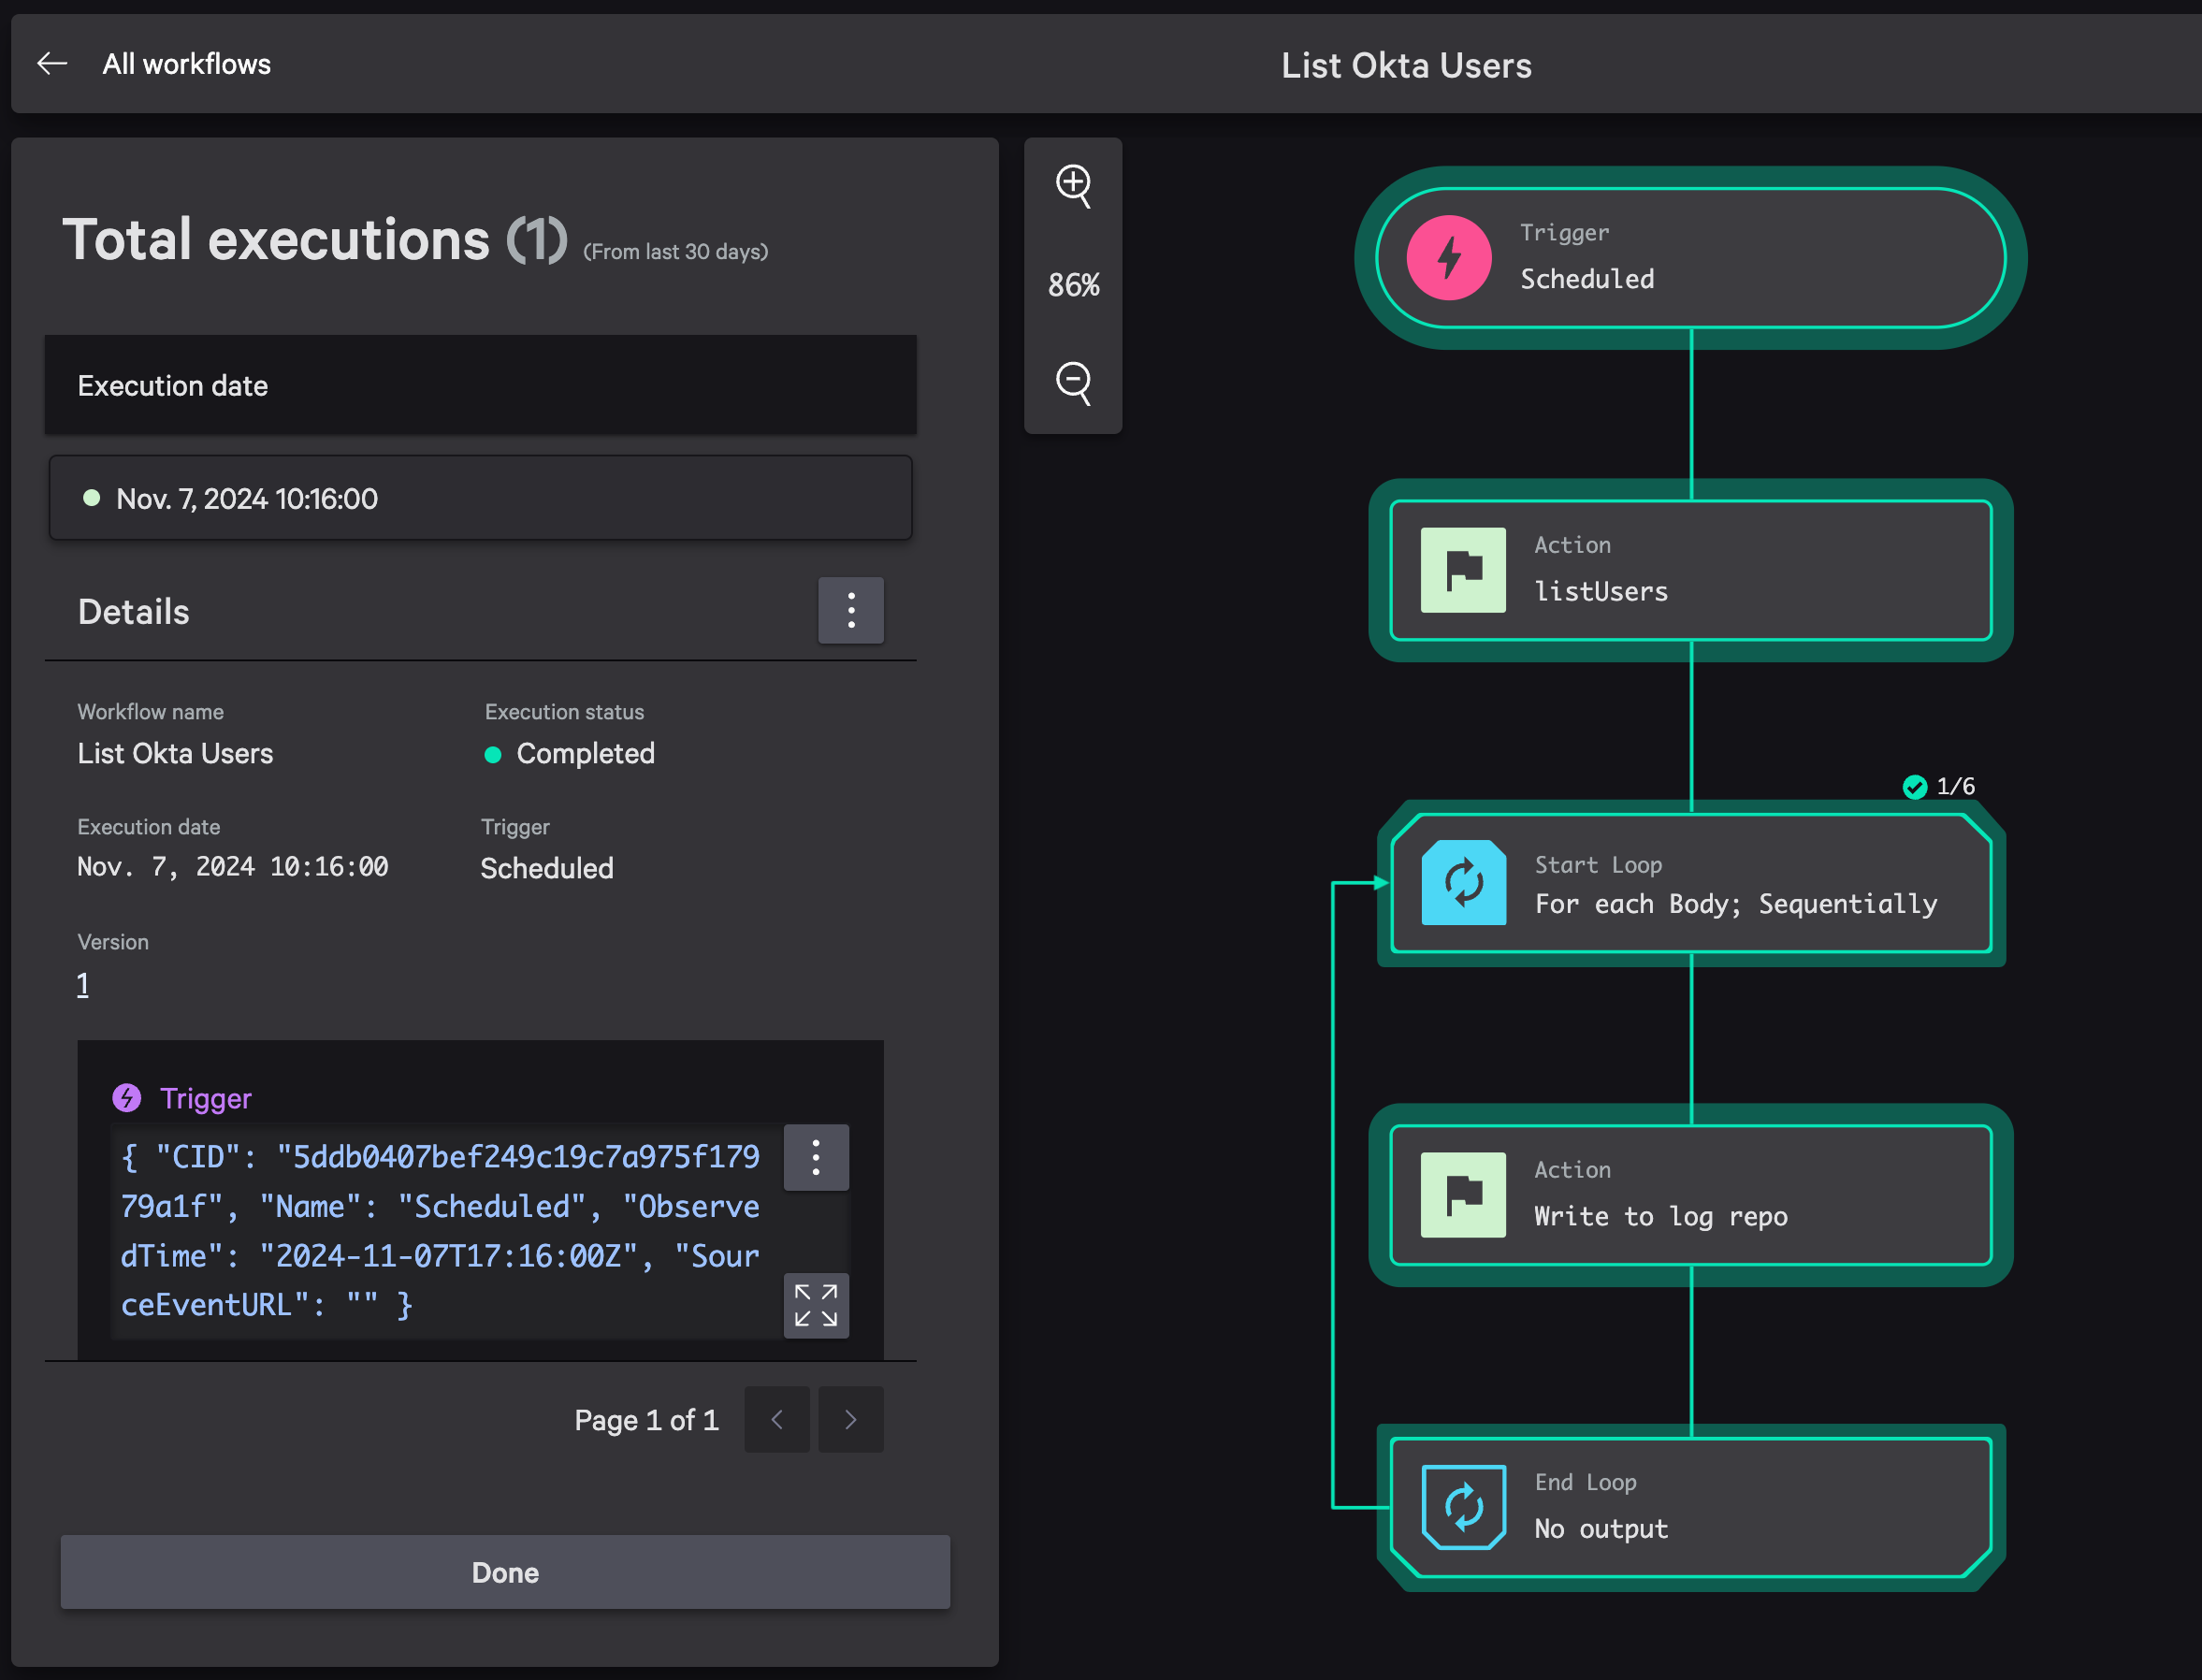
From the workflows list, find List Okta Users and using its actions menu, choose Execute workflow. Skip the next scheduled execution and Execute now. You will see a workflow execution success message with a link to view it.
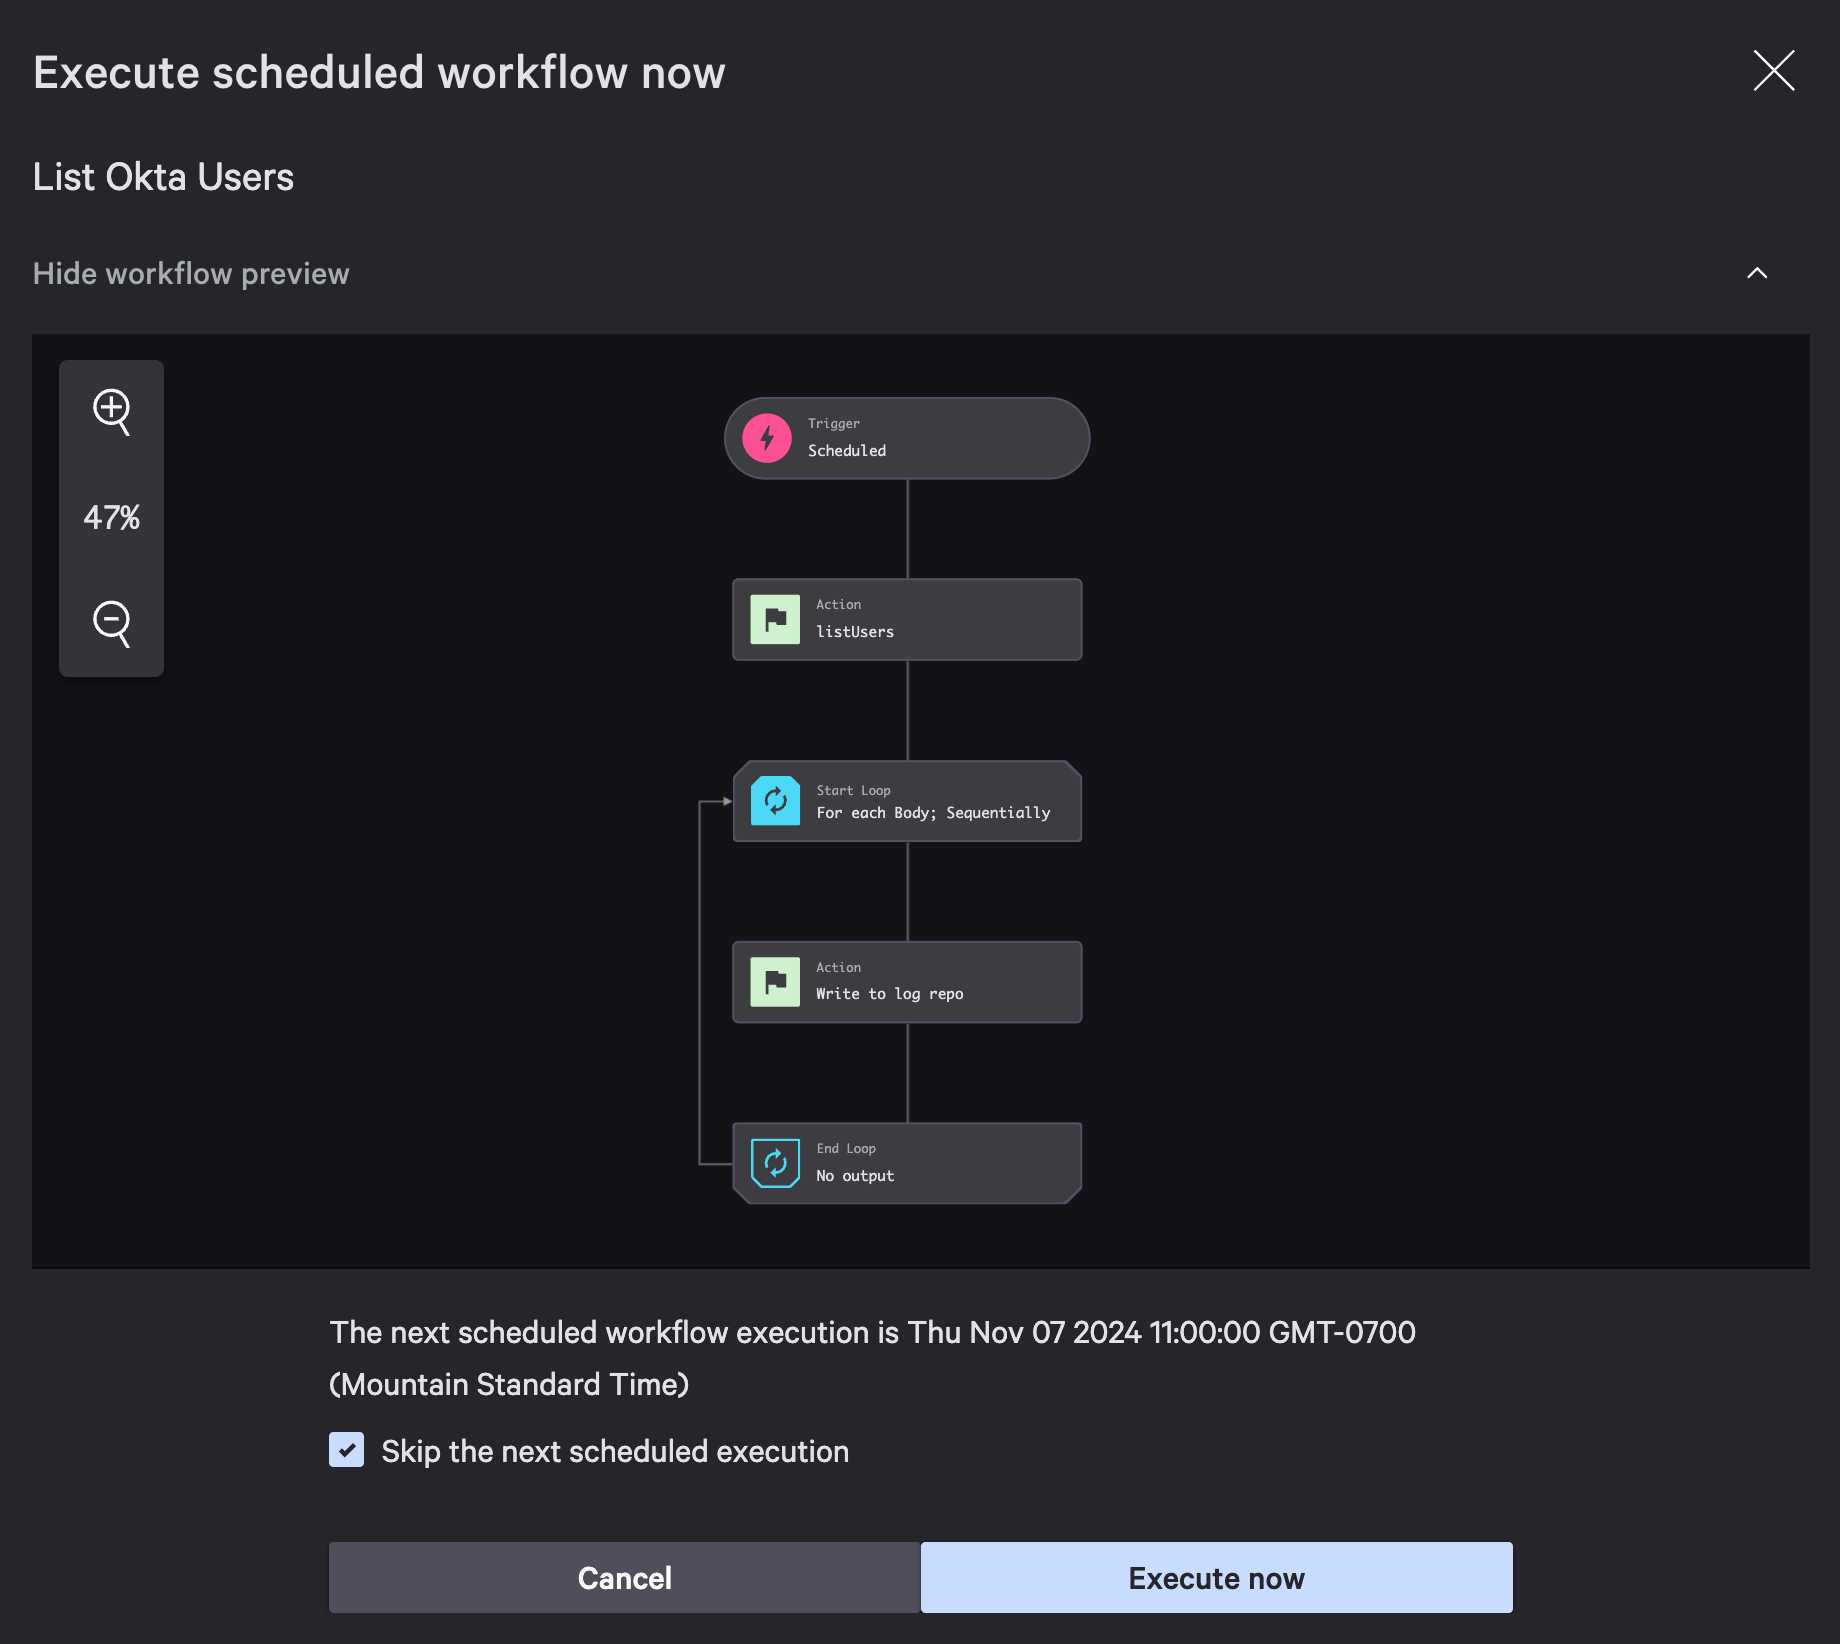
You can also go to the workflow’s execution log and view the execution. You’ll notice all steps are highlighted to show they completed successfully.
View Okta Data in LogScale
To view the processed data in LogScale, to Next-Gen SIEM > Advanced event search. Query against the Fusion repo:
#repo = fusion
Then, add a second line (using Shift + Enter) to filter by event provider:
| event.provider = Okta
You should see an event for each user. I had six users in my account and it shows “Showing fields from 6 events”.
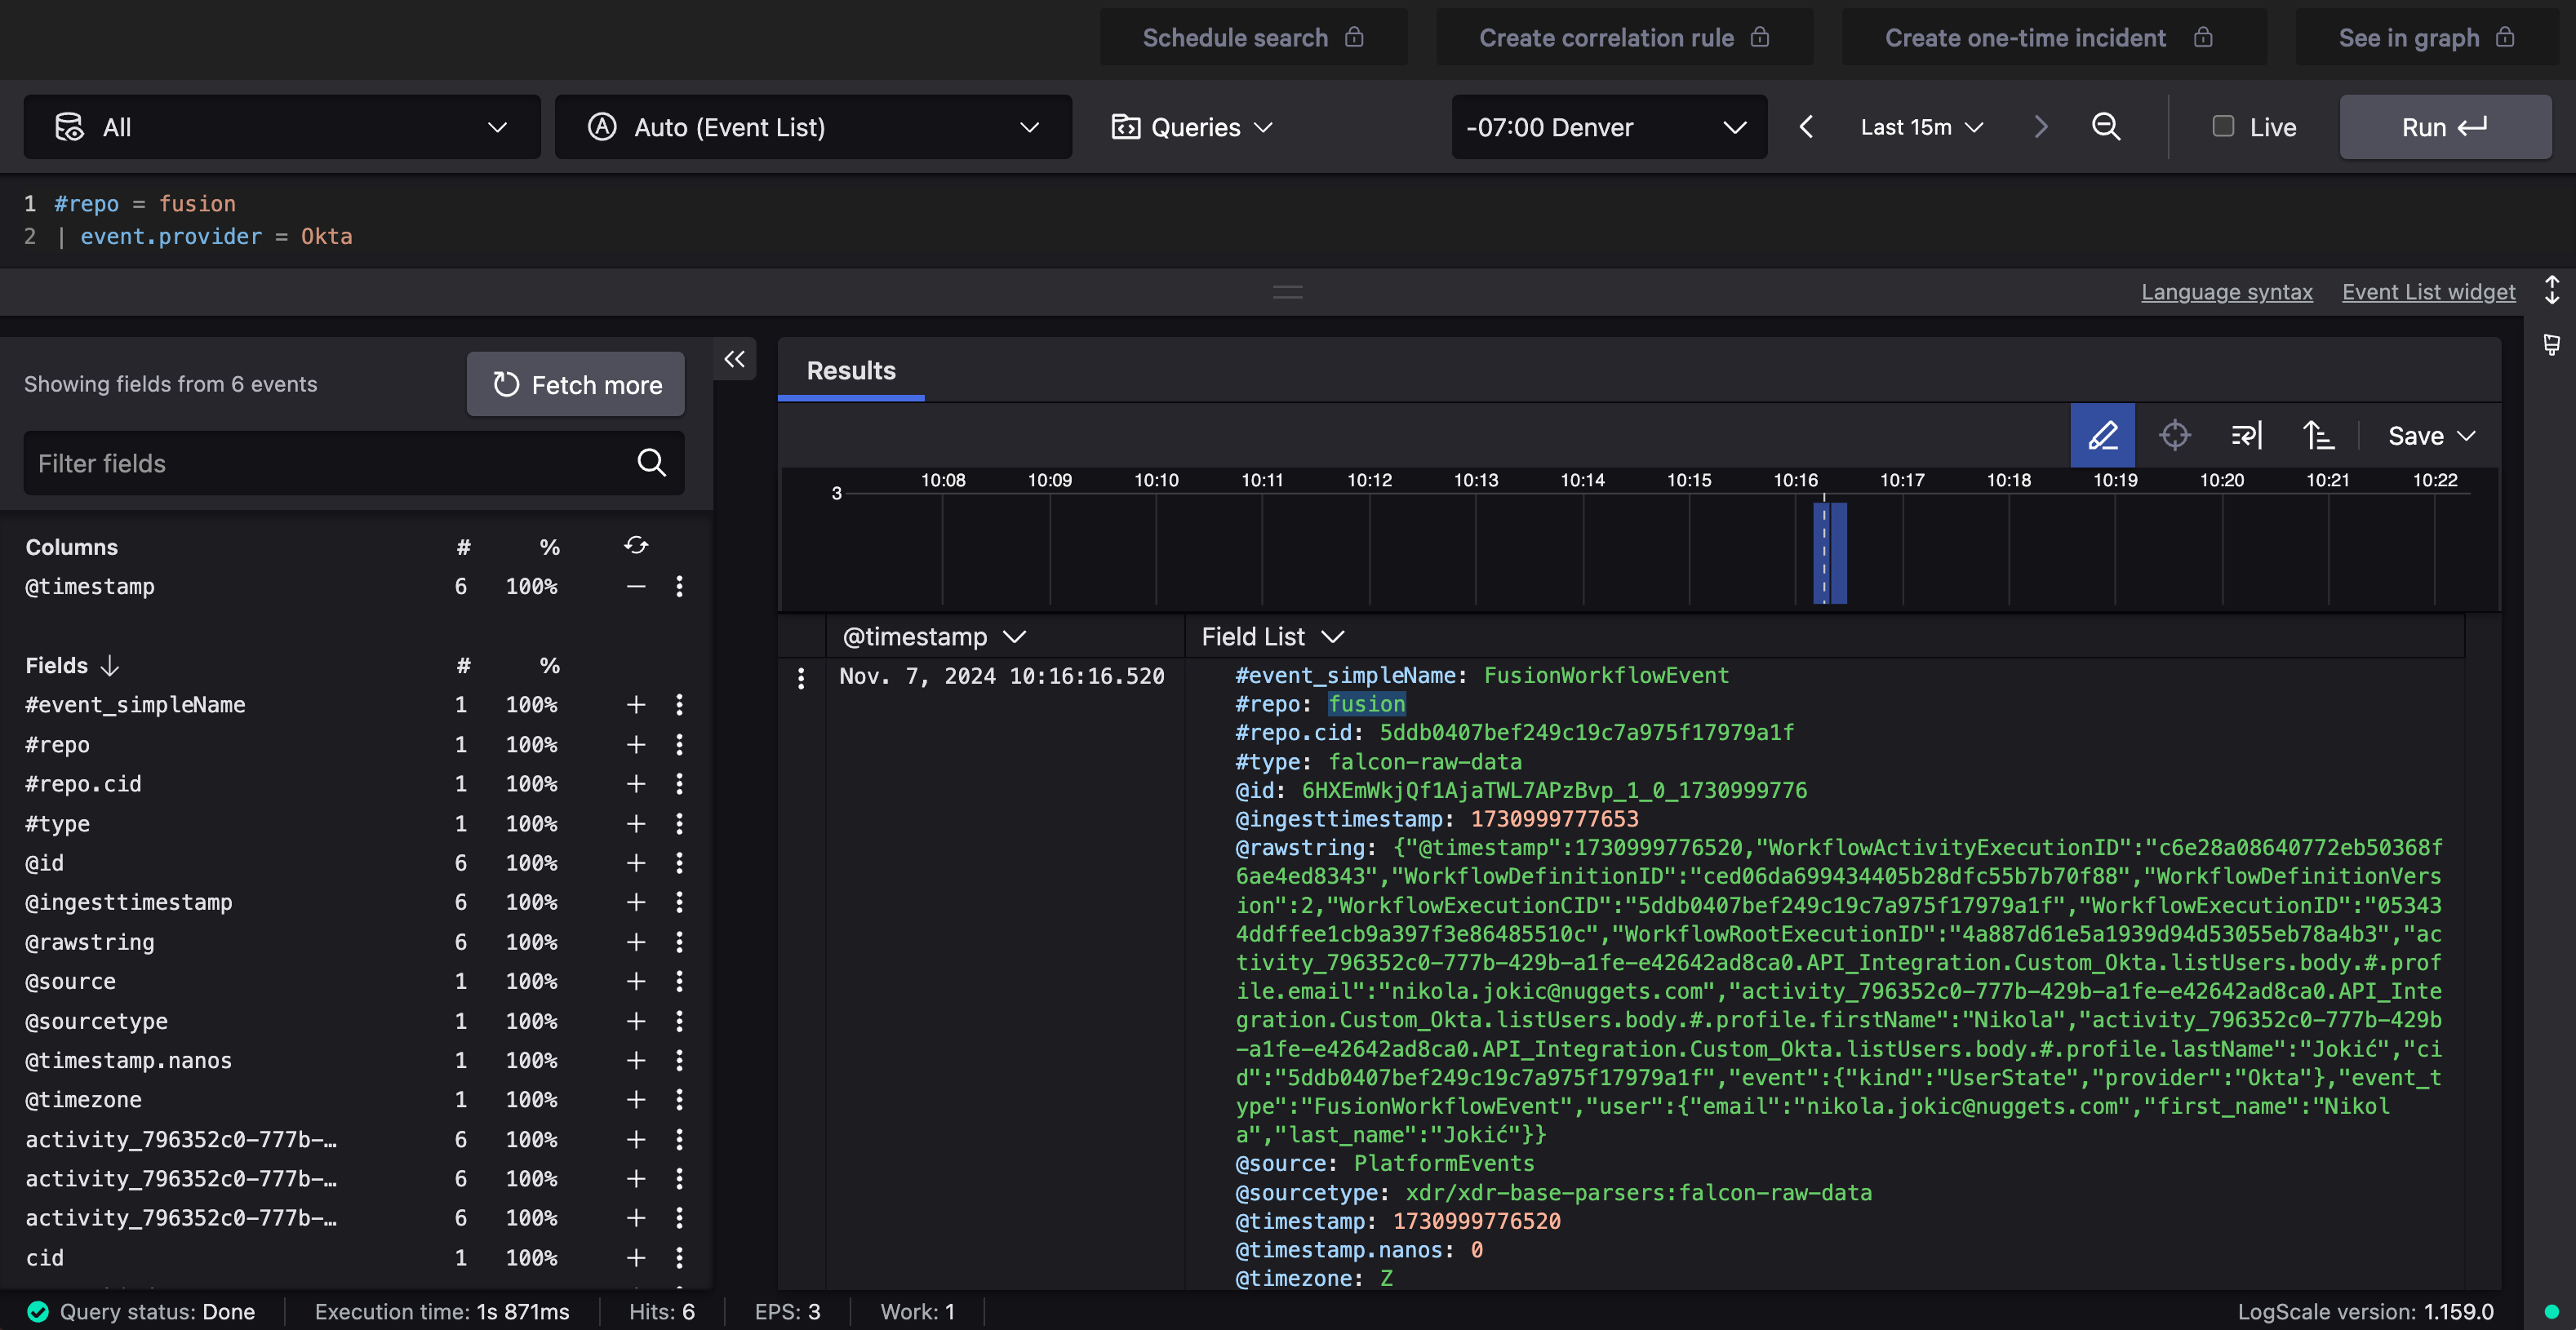
This was a quick example of how a user can get from an OpenAPI spec, to creating a workflow, to ingesting it in LogScale in 15 minutes. This same application can be used to expose other functionality from Okta’s APIs. Maybe kick off a workflow that creates new users when they accept their offer? Or, implement a security use case to deactivate users based on security detections.
Add a Workflow with Autocomplete
One other thing I’d like to show is how the autocomplete configuration on the listUsers operation can be used. If you look at Okta’s API docs for deactivating a user, you’ll notice the request requires a userId parameter. Since it’s unlikely you know a user based on their ID (typically a random string of characters), you can configure a workflow that sets the value by looking it up with their email.
Go to your Okta Demo app in Foundry > App manager. Edit its API integration, specifically the deactivateUser operation. Select Request > Path and edit the userId parameter. Change its title (at the bottom) to Okta User ID.
Then, click the Advanced tab. Select listUsers for the Autocomplete value. Check Sort By Display and Save. Return to your app’s API integrations by clicking Done. Then, deploy the updated app.
- Change type:
Minor - Change log:
Update deactivateUser operation to use autocomplete
Release it as well. Select Major for the change type.
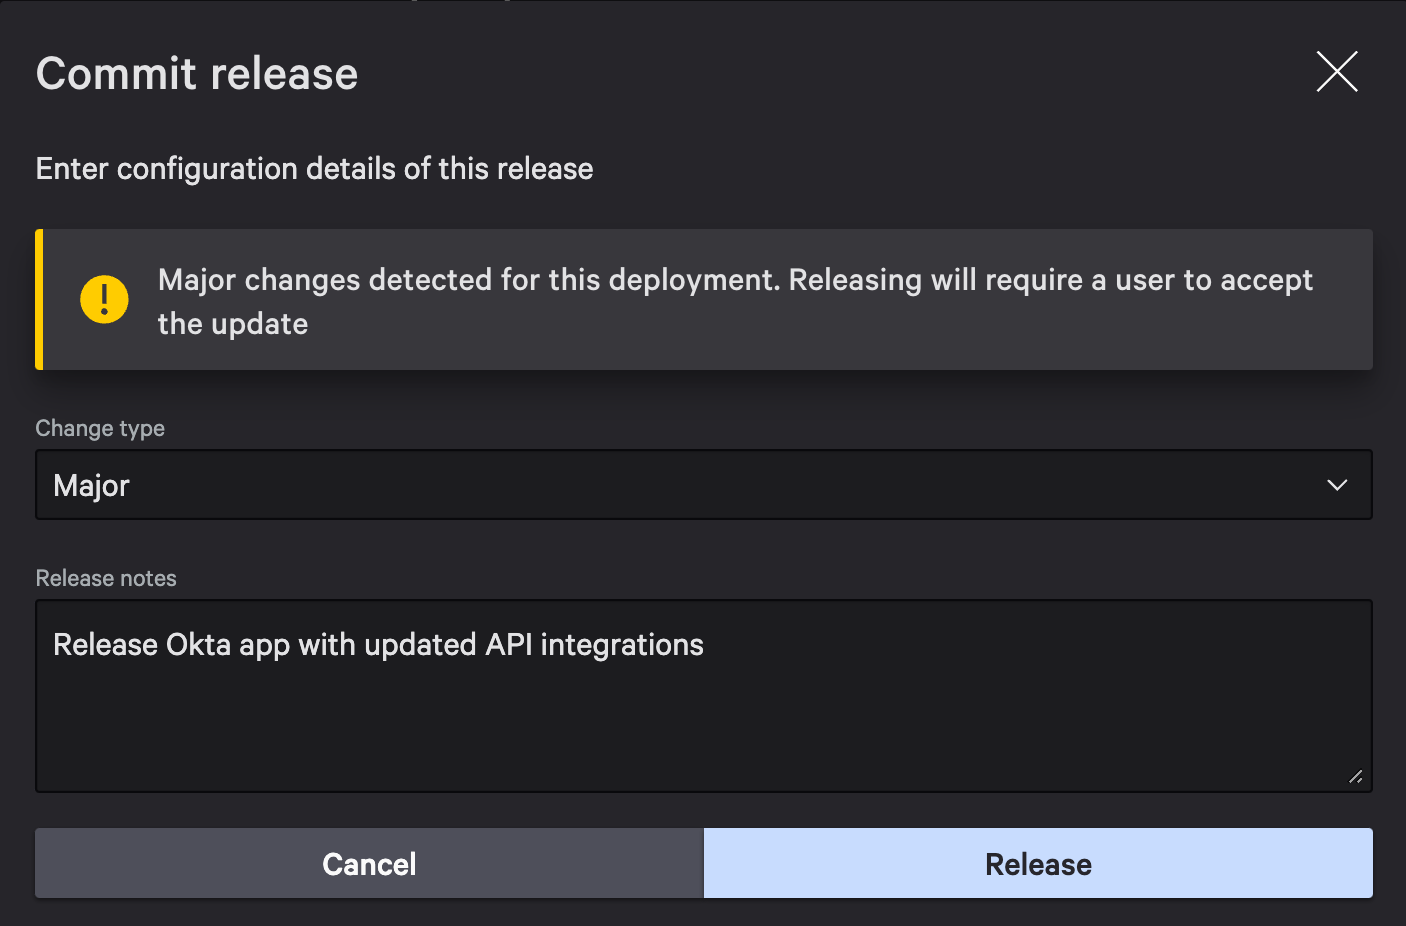
For major changes, consumers will need to go to the App catalog and accept the update. If the release is not major, it’ll automatically be applied to the environment.
Select View in app catalog after releasing the app.

Choose Accept update to install it.
Now, jump back again to Fusion and create a new workflow. Create it from scratch, use on demand as a trigger, and skip the schema builder by clicking Next.
Add a new action and search for the deactivateUser action. Select Okta API Key for the account. Notice how the Okta User ID dropdown auto-completes and shows email addresses.
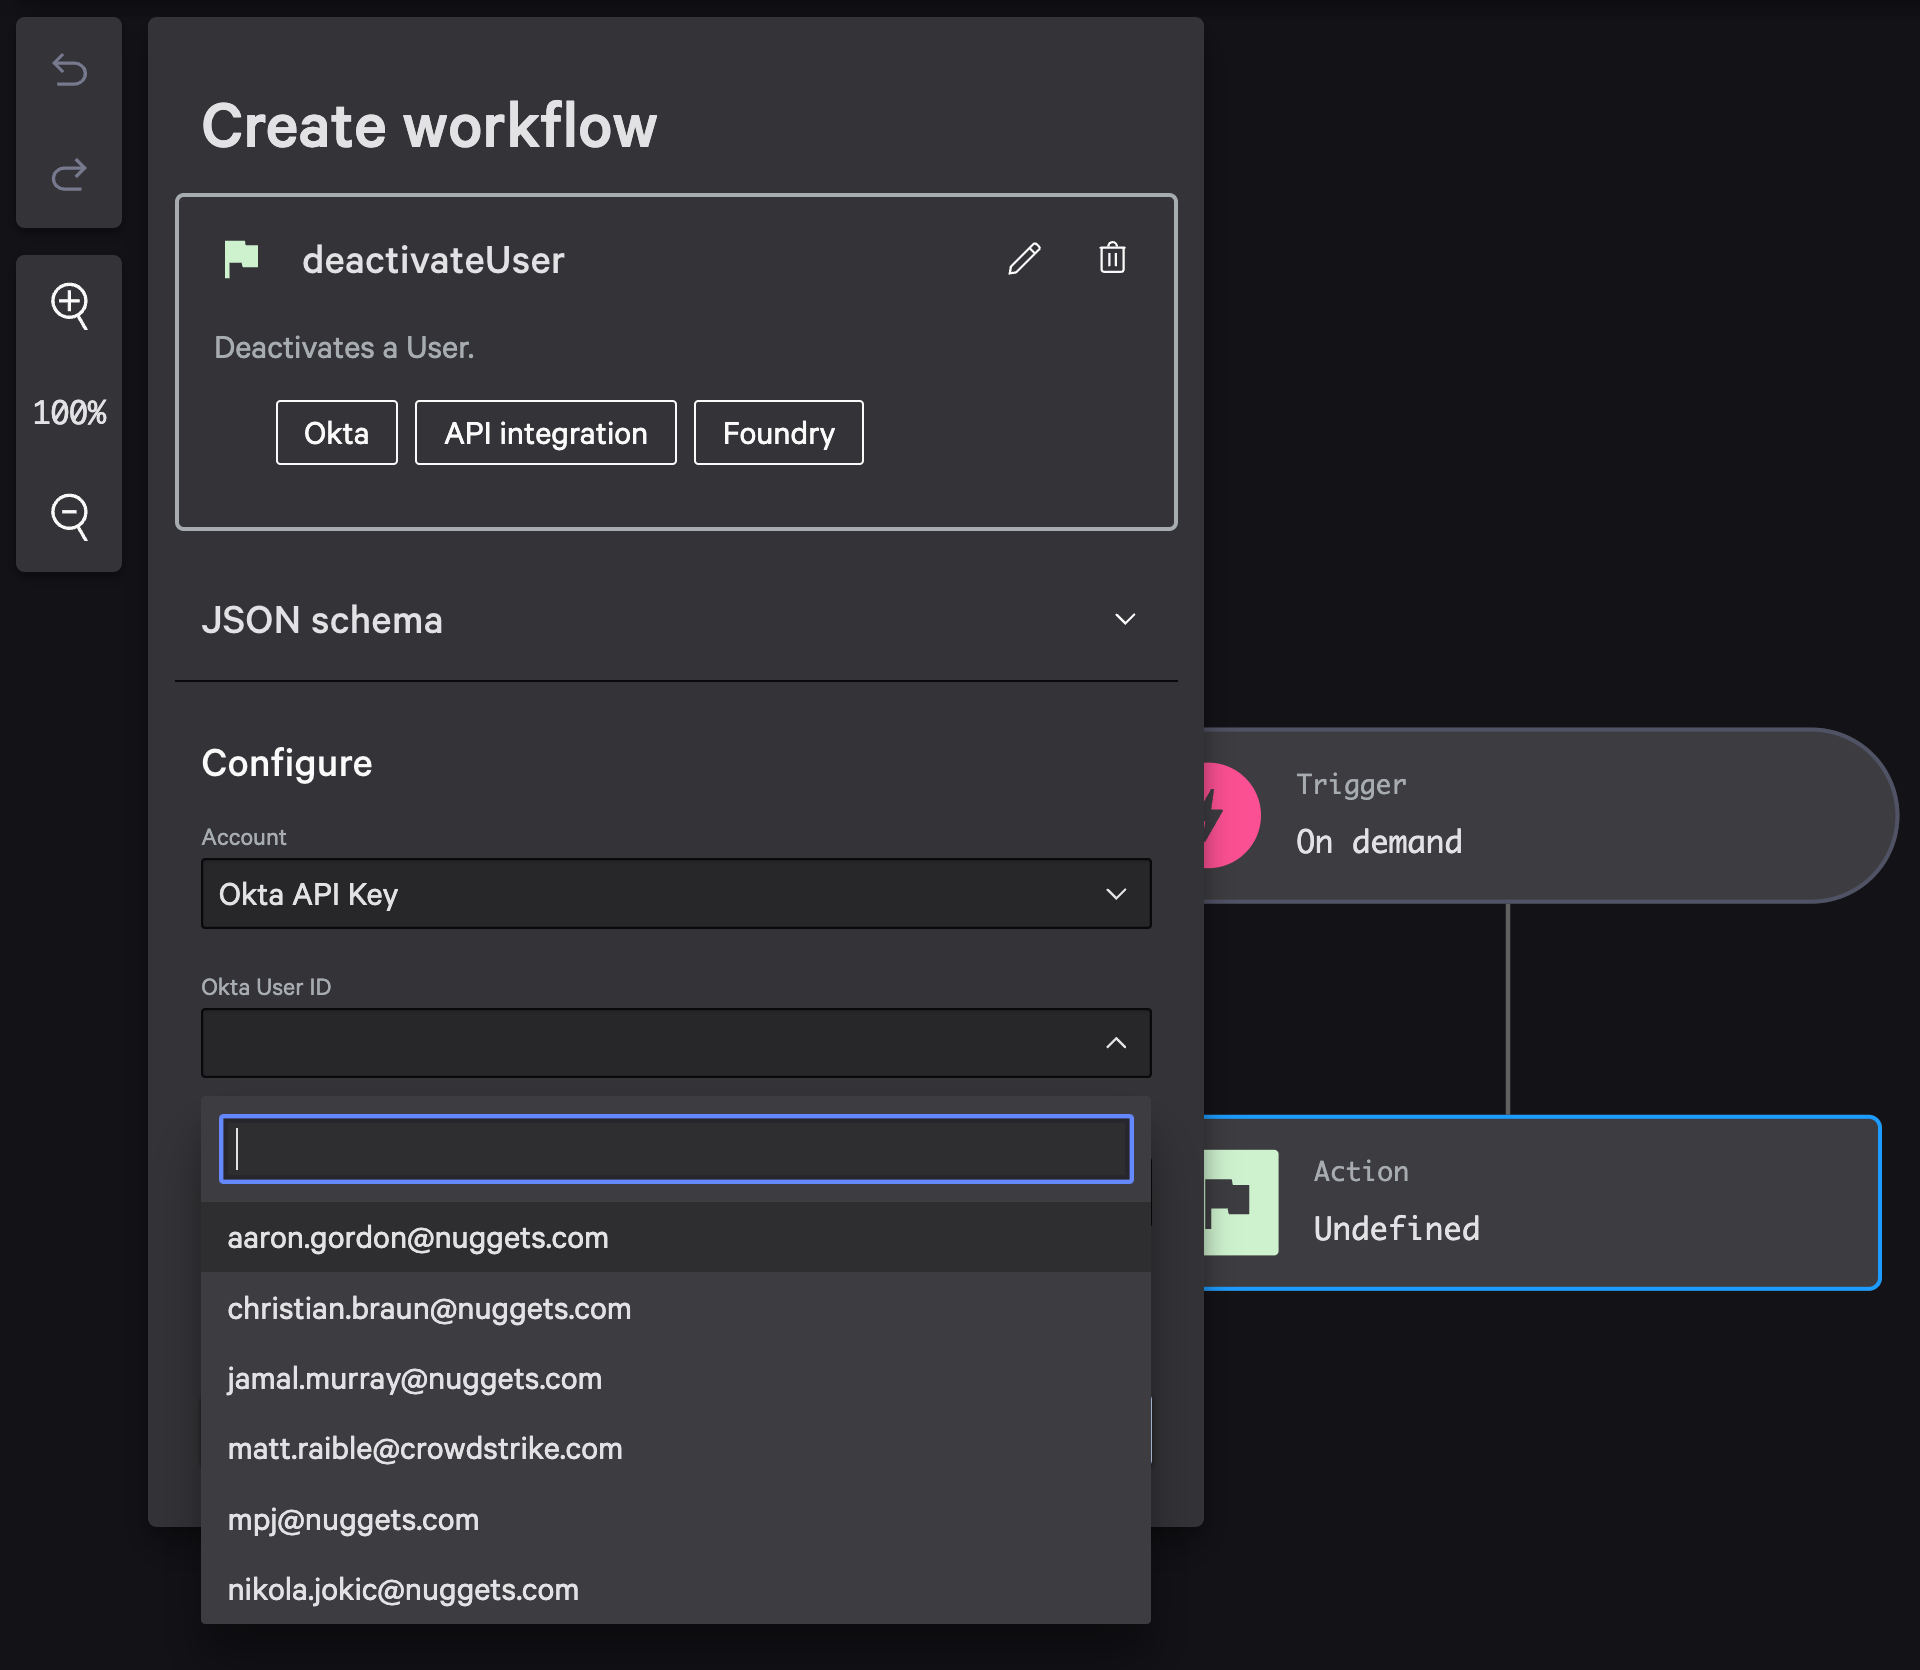
Select one of your sample users. Save the workflow as Deactivate Okta User and set its status to On. Execute the workflow and view its execution.
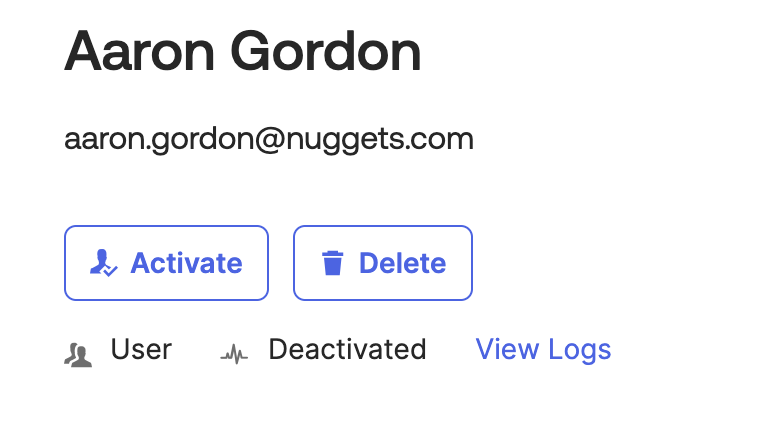
If you view the user in your Okta org, you’ll see it’s deactivated. Huzzah! 🎊
TIP: Make sure to turn off or delete your List Okta Users workflow when you’re finished. Because it’s scheduled to run every hour, you’ll start receiving rate limit warnings from Okta a few days later.
Learn More about Falcon Fusion SOAR
I hope you’ve enjoyed this tutorial about integrating a Falcon Foundry API integration with Falcon Fusion SOAR. If there’s an API you want to integrate with, look for their OpenAPI spec, and try to import it into Falcon Foundry. Pay close attention to the API’s authentication mechanisms. I recommend you try authenticating and making API calls with your favorite API client before trying to integrate it into Falcon Foundry. Once you have that working, import, share operations with Falcon Fusion SOAR and you’ll be well on your way to orchestrating data into Falcon and LogScale.
You can leverage these learnings to build Falcon Foundry apps that integrate with any cloud-hosted or on-prem API and reduce your mean time to respond (MTTR) by standardizing responses using workflow automation. Check out the Content Library to browse the out-of-the-box SOAR Actions templates and build your own apps using Falcon Foundry.
Fun fact: all of the SOAR Action templates were built using Falcon Foundry!
This tutorial doesn’t touch on LogScale in-depth, but I do recommend our Log 201 course in CrowdStrike University. It’s a hands-on one-day course that shows how powerful LogScale is for querying data. By the end, you’ll be able to write your own parser for all your data ingestion needs.
If you have any questions, please join our community, read about our SDKs, and learn how to become a CrowdStrike partner in our Developer Center.
 Matt Raible